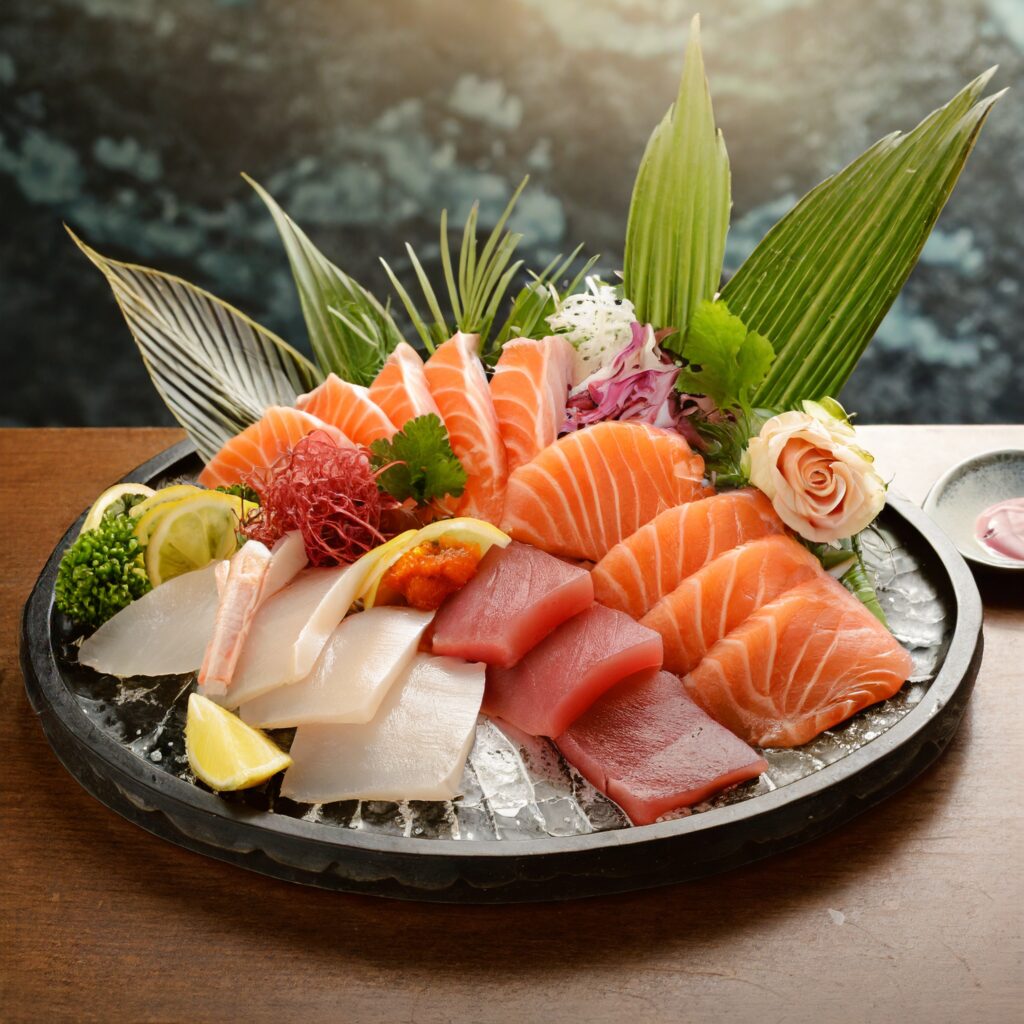
“If I get some fresh fish, I’d love to try making sashimi at home.”
If you love cooking, you’ve probably felt that excitement at least once. However, when it comes to choosing a knife, you might wonder, “Is a sashimi knife the same as a Yanagiba? Would a Deba knife work just as well? Do I really need a special Japanese sashimi knife at home?”
Honestly, I used to think “Having a sashimi knife at home is a luxury…” – after all, you can slice fish with a regular kitchen knife. But when I finally got my own sashimi knife, I was blown away—just one smooth pull and the fish fillet cut cleanly without tearing. That sensation was amazing, and preparing fish turned into a little “luxurious moment” for me.
In this article, we’ll cover what makes a sashimi knife different (or not so different) from a Yanagiba knife, how it compares to a Deba knife, why some say “you don’t really need a sashimi knife,” and tips on choosing one. We’ll also walk through how to use a Yanagiba properly and how to sharpen it. All of this will be explained in an easygoing, relatable way, so you can decide if a sashimi knife deserves a spot in your kitchen!
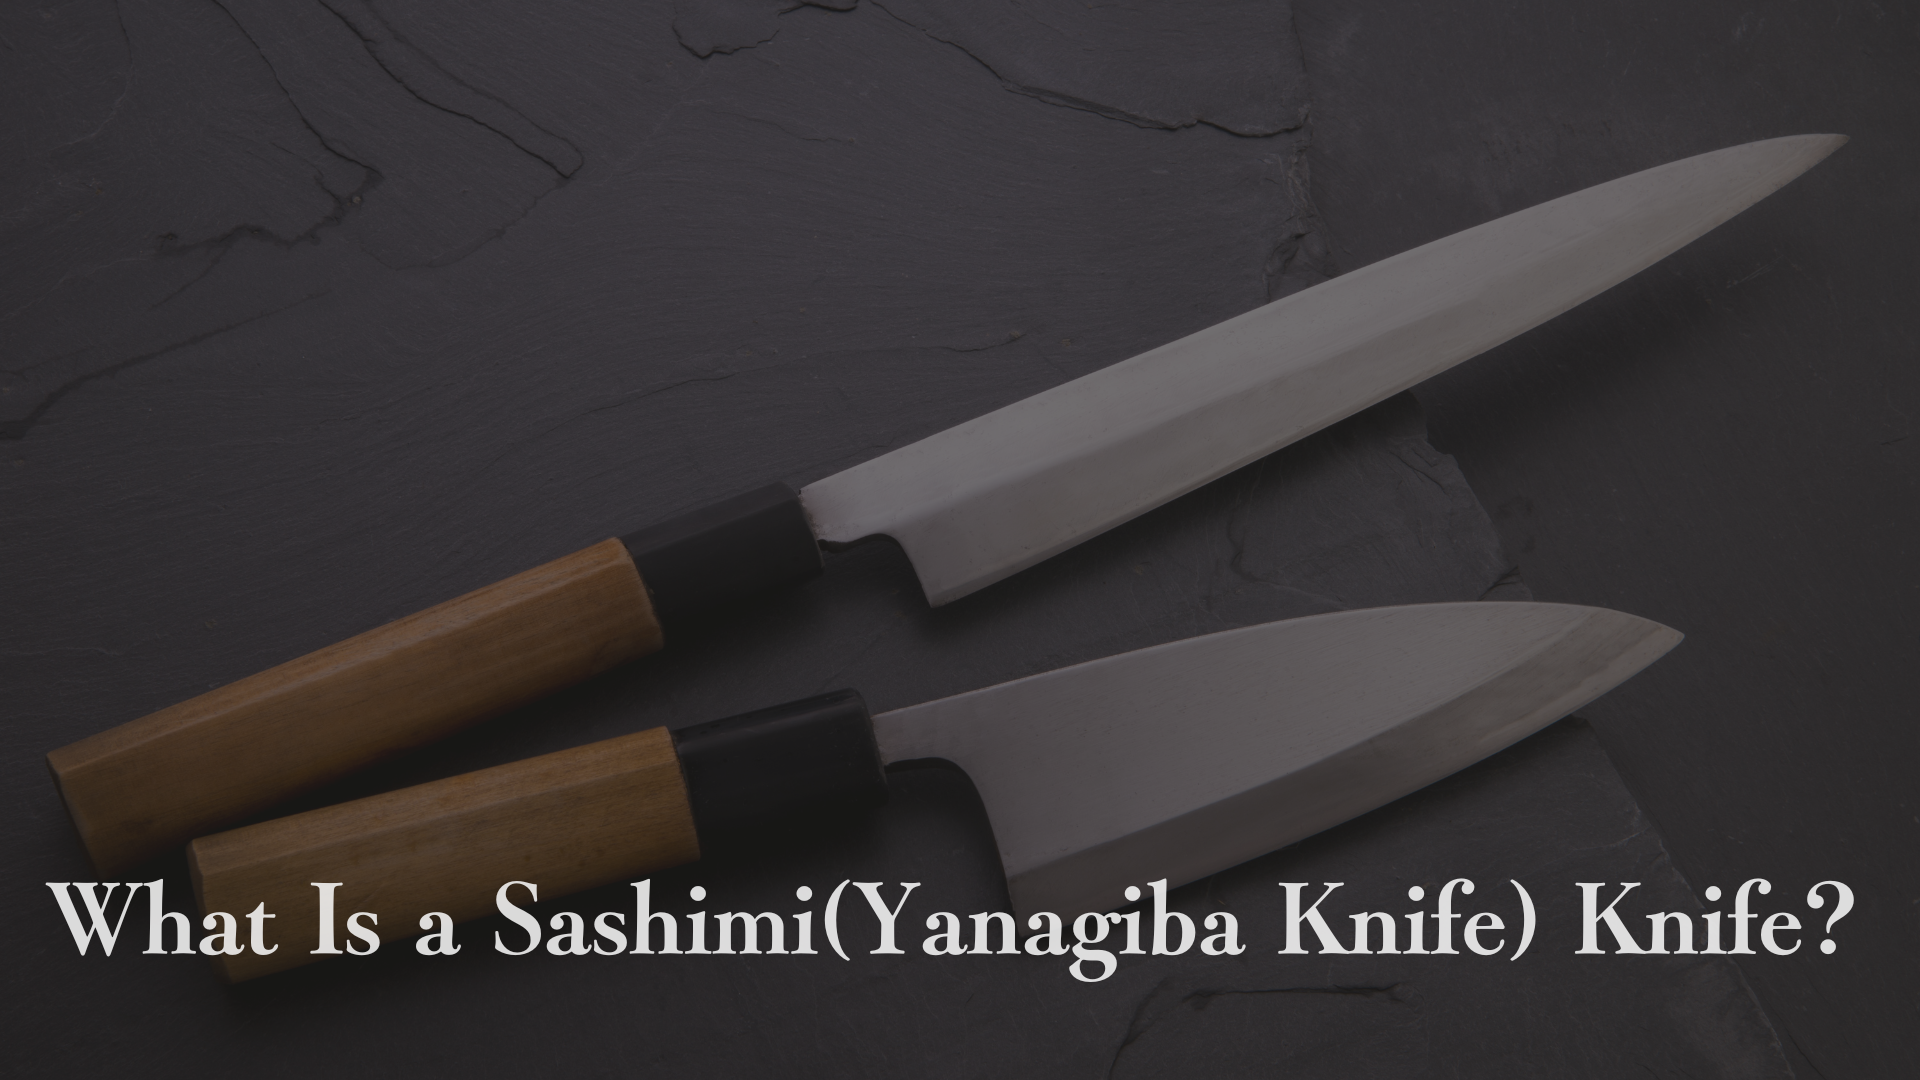
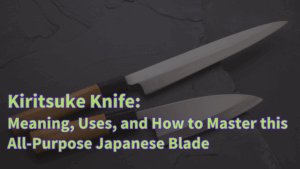
Are Sashimi Knives and Yanagiba Knives the Same? Pronunciation & Key Differences

The Yanagiba knife is prized for its delicate sharpness and the beautiful clean cuts it produces, making it indispensable for preparing sashimi.
By learning about regional differences in knife styles, you can deepen your appreciation for the history and nuance of the sashimi knife. Be sure to choose a knife that fits your cooking style and give delicious sashimi a try!
- Yanagiba Knife: A type of sashimi knife with a long, narrow blade sharply pointed at the tip – its shape resembles a willow leaf (hence “Yanagi-ba,” meaning “willow blade”). Developed primarily in the Kansai region of Japan, this single-bevel knife creates smooth, pristine cut surfaces and has become symbolic of sashimi preparation.
- Sashimi Knife: A general term for any knife used to prepare sashimi. This includes the Yanagiba as well as other regional variants like the Takohiki (octopus slicer) in Kanto, etc. Shapes and uses vary by region, but today the Yanagiba style has become the most widespread sashimi knife in Japan.
(We’ll talk about some recommended sashimi knives later on.)
Note: In essence, “sashimi knife” is a category, and “Yanagiba” is one specific type within that category.
Even though you might hear descriptions like “Deba knives are thick and heavy for chopping through fish heads and bones, and need diligent care if they’re carbon steel; Yanagiba knives are long, thin blades for slicing sashimi cleanly”, you may still wonder how to actually use them differently in the kitchen. Don’t worry – we’ll break it down clearly.
To put it simply, remember these key points about Deba vs Yanagiba:
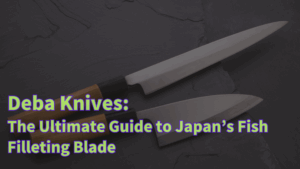
- Deba Knife: A thick, hefty knife meant for powerfully cutting through fish bones and heads. Ideal for bold tasks like filleting (cutting a fish into three pieces) and chopping through bone.
- Yanagiba Knife: A long, slender knife designed for delicate slicing of fish (sashimi, thin cuts) without crushing the flesh. Perfect for achieving beautiful, smooth cut surfaces.
So even though both are knives used for processing fish, their roles are completely different – as different as night and day. If you need to hack through bones with brute force, reach for the Deba; if you want to slice fish thinly and elegantly without damaging it, go for the Yanagiba.
(We’ve covered Deba knives in detail in another article, but here’s a quick recap.)
Deba Knife – What Is It?
We often get asked about the Deba, so let’s touch on its essentials:
- Main Purpose & Features: The Deba is great at breaking down whole fish with bones – tasks like filleting a fish into three pieces, cutting off heads, and chopping through bones. Its blade is thick and carries weight, allowing you to drive through tough parts with force. Many Deba knives are made of carbon steel, so preventing rust (immediate washing and drying after use) is important if you want them to last.
- Best Uses: Perfect for butchering larger fish like yellowtail or sea bream – the thick blade won’t chip even when cutting through fish bones. You can even use a Deba for tasks like cutting through poultry bones. Essentially, if you frequently need to cut through bone-in fish or meat in a powerful motion, a Deba is your go-to.
- Pros & Cons: Pro: When cutting through fish or meat with bones, a Deba’s sturdy edge is less likely to chip, and its weight provides a sense of stability that professionals trust. Con: It’s not suitable for delicate slicing – the blade is thick, making it hard to do thin cuts. And because many Deba knives use carbon steel, you have to be diligent about cleaning and drying them right after use to avoid rust.
(If you’re interested, we also have a ranking of our recommended Deba knives for professionals – including small Deba – in another article.)
Do I Really Need a Sashimi Knife? Is It Necessary?
So, is a sashimi knife (Yanagiba) a must-have, or just a nice-to-have? The answer really depends on your cooking habits and how much you care about the fine details of your cuts.
In short, the “need” for a sashimi knife varies with your lifestyle and your passion for precision in cooking. If you frequently prepare fish dishes and want the highest quality slices, having a dedicated sashimi knife (Yanagiba) is absolutely worth it – it can instantly elevate the presentation and quality of your sashimi. On the other hand, if you rarely make sashimi at home, a substitute knife might serve you just fine. (That said, many people who try using a sashimi knife for the first time are amazed by the difference and become converts, so don’t dismiss it too quickly!)
Ultimately, think about how often you’ll use it. If you seldom slice raw fish yourself, you might manage with other knives. But if you’re on the fence, maybe borrow or try one once – you might be surprised at how much you love the results. Making the call of “I don’t need it” is something to consider carefully, because once you experience it, you may change your mind.
(For more on general-purpose knives that can substitute in a pinch, see the related articles listed at the end.)
When You Might Not Need a Sashimi Knife
Rarely prepare sashimi (or usually buy pre-sliced fish)
- If you typically buy fish already sliced for sashimi from the supermarket or fishmonger, you won’t have many opportunities to use a sashimi knife.
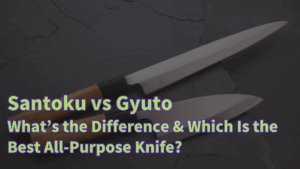
- If you generally don’t slice sashimi yourself on a regular basis, your standard kitchen knives (like a Santoku or Gyuto) will handle the occasional task well enough.
Limited kitchen space or storage for knives
- Sashimi knives tend to be long-bladed. They require some space for safe storage (in a knife sheath or case) and careful handling.
- If your kitchen is very small or you already have many knives, adding a long knife could be more of a storage and maintenance hassle than it’s worth.
Not particular about ultra-fine cuts or presentation
- Sashimi knives are all about achieving a beautiful cross-section and paper-thin, even slices of fish.
- If you’re not especially concerned with those details (i.e. you’re okay with the results you get using your regular chef’s knife), then you might not feel a strong need for a dedicated sashimi knife in many cases.
Situations Where Having a Sashimi Knife Is Worth It
- If you often buy whole fish and fillet them yourself, or you love plating sashimi beautifully, a sashimi knife will make the process much easier and yield more beautiful results compared to using a regular knife.
- Many first-time users are astonished: “I can’t believe how much better the slices look!” It can be a game-changer that brings a lot of joy if you prepare sashimi regularly.
- Because a Yanagiba is used with a smooth pulling motion that doesn’t crush the cells of the fish, the texture of the fish remains silky and the cut surface looks almost transparent and shiny.
- The difference in the appearance and mouthfeel of sashimi sliced with a proper Yanagiba vs a regular knife is significant. If you’re particular about presentation and texture, a sashimi knife dramatically boosts the quality of your dish.
- A Yanagiba (sashimi knife), with its long blade, is specialized for the kind of thin slicing used in sashimi and sushi. It allows you to make paper-thin slices (think fugu sashimi or carpaccio-style slices) with precision.
- If you want to impress guests at a party with a beautiful sashimi platter, having a sashimi knife will help you achieve those clean, professional-looking cuts much more easily.
Alternatives If You Don’t Have a Sashimi Knife
If you decide not to get a sashimi knife right now, here are some common substitutes and their limitations:
- These multipurpose knives are found in most homes and can be used to cut sashimi. You can certainly slice fish with a sharp Santoku or Gyuto.
- However, their blades are shorter and usually thicker, which makes it hard to do one long pull cut through a whole piece of fish. You often can’t slice in one go and might end up sawing, which can crush the delicate fish fibers. So the cut surface won’t be as smooth as with a Yanagiba.
- A small utility knife (petty knife) could be used for very small fish fillets or trimming sashimi in a pinch, especially if you’re only preparing a small amount.
- But because the blade is quite short, achieving beautiful, even thin slices is more difficult. A petty knife really only serves as a very limited makeshift option, and it won’t give you great results for larger sashimi cuts.
- Without a true sashimi knife’s long blade, you simply cannot perform the classic “pull cut” in the same way. This means the cut surface of your sashimi will likely be less clean and smooth.
- It’s fine to use other knives for sashimi occasionally, especially if you’re not too fussy. But if you want to seriously enjoy sashimi preparation and presentation, you’ll eventually find yourself wanting that dedicated knife to achieve the proper cut quality.
How to Use a Yanagiba Sashimi Knife: Tips for Professional-Looking Results
“Never push-cut; once the knife touches the fish, slice by pulling it toward you.” This is the golden rule when handling a Yanagiba knife.
The Yanagiba is an artfully designed Japanese knife created specifically to slice fish beautifully with a pulling motion. It might take a little practice to get used to, but as we mentioned, simply committing to pulling, not pushing the blade will dramatically improve your results.
Mastering this one technique can already elevate your home sashimi and sushi. Here are a few key pointers:
- Use a pulling cut (drawing the blade toward you) instead of pushing forward. This way you avoid crushing the fish’s fibers and get a clean, smooth cut surface.
- Use the entire blade from tip to base. Even in a relatively short stroke, if you let the long blade do the work from the very tip through to the heel, you can slice cleanly without much force. The key is to not muscle it, but to glide the full length of the blade.
- Pay attention to finishing touches and care as well. If you plate the sashimi nicely and maintain your knife well, you’ll end up with sashimi and sushi that look as if a professional chef prepared them.
Now, let’s break down these techniques in detail.
“Don’t Push, Only Pull” – The Basic Cutting Technique
- Fish flesh has delicate, soft fibers. If you try to push the knife downward while cutting, you end up compressing and crushing those fibers, often resulting in a ragged, torn cut surface.
- This is especially true with a Yanagiba, which is single-beveled (sharpened on one side only) and optimized for pulling. If you attempt a push-cut with it, you’re not utilizing its edge properly and will likely mangle the fish.
- When you place the blade in the fish and simply pull it toward you in one smooth motion, you slice through without putting extra pressure on the cut surface. This yields a very clean cut with minimal effort.
- By not crushing the flesh, you preserve the fish’s texture and appearance. The cut surface will have a translucent sheen, and any marbling or fat (like the layers in tuna or salmon) will appear neatly defined. In short, you get beautiful sashimi that looks appetizing.
Imagine Using the Entire Blade from Tip to Base
To make the most of the Yanagiba’s long blade, your posture and technique should leverage the full length of the edge:
When you pull the knife, if you only use the very tip to cut, the blade can snag in one spot. Keep the image of “using the whole blade smoothly” in mind – you want to slice through the fish in one straight, swift motion. Think of it like drawing the blade in a single stroke so the fish is cut with a satisfying shhhk sound – that’s the kind of clean cut you’re aiming for.
- The Yanagiba’s blade is long and uniformly sharpened along its length. This means that even if your pulling stroke is relatively short, a sharp Yanagiba can still cut perfectly well because every part of its edge is keen.
- By pulling the knife straight through in one go, you are effectively slicing the fish’s fibers in one continuous motion. This ensures the cut surface remains smooth and the texture of the sashimi is tender. It improves both the appearance and mouthfeel of the slice.
Things to Keep in Mind When Actually Cutting Sashimi
- When slicing sashimi, lay your piece of fish at a slight angle on the cutting board (rather than perfectly square). Then hold your knife blade at a shallow angle (almost parallel) to the fish’s surface as you begin to cut. This increases the contact area between the blade and the fish.
- With more blade touching the fish, you can make a cleaner cut through a wider cross-section in one stroke. In practical terms, angling the fish and the knife helps you slice through in one pull more easily, producing a smooth, even cut.
- Grip the handle (hilt) of the knife firmly to have control, but try not to tense up your fingertips. A white-knuckle grip can make your hand too rigid; you want a firm yet relaxed hold.
- Remember, the Yanagiba is single-edged, which means as you cut, the blade naturally wants to curve inward toward the sharp side. Be aware of this tendency. Focus on guiding the whole blade evenly through the cut, not just the edge or tip, to get slices of uniform thickness without the blade veering off.
- Ideally, you want to slice off each piece in one continuous stroke without stopping or sawing back and forth. This means starting the cut and pulling straight through until the slice is separated, all in one motion.
- If you don’t cut all the way and have to stop and restart, or if you make a back-and-forth motion, you risk roughing up a portion of the cut surface or creating a double cut line. So try to commit to that one stroke – if you didn’t make it through, it’s better to start the cut over on that piece rather than hacking at it multiple times.
Recommended Practice Methods
Not confident yet? Don’t worry – here are a few ways to practice your Yanagiba technique:
- Practicing on a large fillet right away can be tricky because it requires a long stroke and steady hand, which is hard when you’re just beginning.
- Begin with a smaller fillet or piece of fish (for example, the tail-end piece of a salmon fillet). With a smaller piece, you can focus on shorter pull cuts. It’s easier to get the feel for the motion on a short distance, and then you can work up to longer cuts as you improve.
- You don’t have to practice only on expensive fish! Try using a Yanagiba (or simulate the motion with another long knife) on vegetables like cucumbers or daikon radishes. Practice slicing them thinly with the same pull technique.
- Vegetables have a different feel and resistance than fish, of course, but this drill is great for training yourself to maintain a consistent angle and smooth motion. For instance, slicing a cucumber paper-thin without pressing down too hard can mimic the technique needed for sashimi.
- When you’re not yet used to the pulling cut, trying to slice quickly can cause your blade angle or path to wobble, which might crush or tear the fish.
- In the beginning, do your slicing motion almost in slow-motion to really ingrain the feeling of the cut. As that becomes comfortable, you can slowly increase your speed. The goal is to be able to pull the knife faster while still maintaining control – with time, you’ll be slicing swiftly and smoothly without even thinking about it.
Finishing Touches to Make It Look Professional
To truly plate sashimi like a pro, it’s not just the cutting technique – it’s also what you do after cutting. Here are some finishing steps to elevate your sashimi presentation and keep your knife in great shape:
Step 1: Check the cut surface
- Once you’ve sliced your fish, take a close look at the cut surfaces. Are they glossy? Is the thickness consistent? If you see an even shine and uniform slices, that’s a sign your pull-cut technique went well.
- Another pro tip: gently run your fingertip across the surface of one slice (just be sure your hands are clean). If the surface feels smooth and not ragged, you nailed it. If it’s rough, it might mean you applied a bit of pressure or sawed – something to adjust next time. This little quality check can tell you a lot about your technique.
Step 2: Keep the blade clean
- Many Yanagiba knives are made of high-carbon steel, which can rust if not cared for. As soon as you finish using your knife, wash it and dry it thoroughly. Wipe off all moisture; even a bit of water left can start rust spots.
- It’s also a good habit to apply a light coat of oil on the blade before storing, especially if it’s carbon steel. A little camellia oil (a traditional choice in Japan) or even a drop of cooking oil spread thinly over the blade helps prevent rust. (Don’t overdo the oil – just a thin film is enough, wipe off any excess so it’s not greasy.)
Step 3: Wow them with plating
- Sashimi (or thin-sliced usuzukuri) isn’t just about the cut – presentation matters too! To show off those beautiful slices you’ve cut with your Yanagiba, consider the plate and arrangement. For example, using a dark plate can contrast with the fish color to make it “pop,” and slightly overlapping the slices can show off their translucency. Also think about adding some height or structure to the arrangement.
- If you want your dish to scream “professional chef!”, garnish is your friend. Try adding a few shiso leaves, a neat pile of daikon radish threads (tsuma), or some colorful vegetable garnishes. They add visual interest and dimension. A well-placed garnish alongside neatly sliced sashimi can make your home creation look like it’s served at a sushi bar.
How to Sharpen a Yanagiba Knife – Proper Maintenance for Lasting Sharpness
Why do you need to sharpen your knife regularly? It’s simple: if your blade gets dull or a bit rusty, it won’t cut well – you’ll start forcing it, which can damage the edge and even be unsafe. It becomes a negative spiral of dullness, damage, and frustration. For both safety and performance, regular sharpening is essential.
The real allure of a Yanagiba (and any good Japanese knife) is that razor-thin, sharp edge which gives you those silky cuts. To keep enjoying that, you’ll need to maintain the blade’s edge through proper sharpening and care. Don’t worry – it’s part of the craft and can even be enjoyable!
If you master sharpening yourself, you’ll get a kick out of how each time you make sashimi or sushi, you can say “Wow, this cut is just like a pro!” It’s a satisfying feeling knowing you played a part in that sharpness.
Before diving into technique, let’s note a few key points:
- Sharpening a Yanagiba (single-bevel) requires some special attention: On the front side (the beveled edge side), you must maintain a consistent angle and sharpen methodically through medium and fine grits. On the flat back side, you mostly just remove the burr lightly. (We’ll detail this soon.)
- Pro sharpening service vs DIY: If you have a very expensive knife or you’re nervous about sharpening, it’s absolutely fine to take it to a professional. But once you get the hang of sharpening on your own, you’ll likely become more attached to your knife and enjoy the process – plus, you can touch up the edge whenever you need.
- Finish and store it properly: After sharpening, always rinse off any metal particles and dry the knife completely. If you coat the blade with a bit of oil before storing, it’ll stay rust-free longer. Maintenance isn’t just sharpening – it’s also how you take care of the knife afterward.
Alright, let’s get into the details of how to sharpen a Yanagiba step by step.
Sharpening a Single-Bevel Blade: Important Points
Sharpening a Yanagiba involves working on two sides differently. The blade has a bevel on the front side (the side with the edge) and a flat or slightly concave back side.
- Keep a consistent angle.
- Because a Yanagiba is single-beveled, you need to hold the blade side (front) at a stable angle against the whetstone. Generally, aim for roughly a 15–20° angle between the blade and stone.
- Be careful that the entire side of the knife isn’t flat on the stone – you want to sharpen the edge bevel, not grind the whole side of the knife. So make sure you’re just tilting enough to engage the edge. Maintaining this angle consistently as you move the knife is crucial for an even edge.
- Use the right grit progression.
- Rough/medium sharpening: Start with a medium grit stone (around #1000 grit). This will reshape the edge apex, remove small nicks, and establish the basic edge. You’ll see some metal being removed; this is normal as you create a fresh sharp edge.
- Finishing: After the #1000, move to a fine finishing stone (around #3000–#5000 grit). This polishes and refines the edge, often to a near mirror finish on the bevel.
- It’s at this finishing stage that the blade really gains its sharp, silky edge, so take your time. Don’t rush the fine sharpening – the more evenly and patiently you do this, the sharper (and longer-lasting) the edge will be.
- Balance your stroke count.
- When sharpening the blade, try to make sure you grind the edge evenly along its entire length. A good habit is to count your strokes (or time) on each section of the blade to keep it uniform. For instance, do the same number of strokes on the tip area, middle, and heel.
- If you sharpen one part of the edge more than another, you can alter the blade’s geometry, making some spots sharper than others or even warping the edge line. So keep it balanced – an even edge means consistent sharpness when cutting.
- Keep it almost flat.
- The back side of a Yanagiba is mostly flat and often has a very slight hollow (this is called “urasuki”). When sharpening the back, you basically lay it nearly flat on the stone.
- The goal on this side isn’t to create a new edge, but rather to remove the burr that forms from sharpening the front, and to lightly polish the back edge. So you only need to gently slide the flat side on the stone a couple of times. Do not grind it at an angle like the front – keep it as flush as possible with the stone.
- Very light pressure, very few passes.
- You typically only need a few passes on a fine stone for the back side. Think of it as stropping or deburring – you’re just cleaning up that edge. Use almost no pressure; let the weight of the knife do the work as you move it.
- If you push down hard or overdo it on the back, you risk scratching it up or even deforming the edge you just worked hard to sharpen. A common guideline is maybe 2–3 light strokes on the back for every 10 or so strokes on the front, just to ensure any burr is gone and the edge is straight.
“It’s Okay to Let a Pro Handle It Until You Get the Hang of It”
When you’re new to sharpening (especially these expensive knives), it’s perfectly fine to be cautious. Here are some thoughts on letting a professional sharpener or craftsman do the job, versus doing it yourself:
- High-grade steel is more delicate.
- Many Yanagiba knives use high-quality carbon steels like Aogami (blue paper steel) or Shirogami (white paper steel). These steels take a super sharp edge, but they can also be somewhat unforgiving.
- That means if you make a mistake sharpening (like putting a deep scratch or mis-angling the blade), you could chip the edge or create a lot of work to fix it. Repairing a badly chipped or mis-sharpened Yanagiba can be difficult and may require an expert. So, it’s understandable to be a bit afraid of messing up an expensive blade.
- Consider professional sharpening services.
- If you’re thinking, “Sharpening it myself from the start is a bit scary…”, there’s no shame in taking it to a professional. Many cutlery shops or even the knife’s manufacturer/blacksmith offer sharpening services.
- When a pro sharpens your knife, they’ll return it with a razor-sharp, perfectly tuned edge. It can actually be educational to see (and feel) how your knife cuts after a professional sharpening – it sets a benchmark for what you’re aiming for. Plus, you avoid the risk of damaging a pricey blade while you’re still learning.
- 5–10 minutes of work can yield dramatic results.
- Once you get the hang of it, sharpening a Yanagiba (going through medium to fine stones) might only take 5-10 minutes of focused work. And the difference in cutting after those few minutes can be night-and-day.
- The first time you turn a knife from dull to scary sharp by yourself, it’s a eureka moment: “Wow, it slices so smoothly now!”. That feeling of accomplishment – knowing you can make your knife cut like new (or better) on your own – is arguably the biggest reward of learning to sharpen.
- A therapeutic “conversation” with your knife.
- Believe it or not, many people find the sharpening process relaxing and meditative. You soak the whetstone, hear the rhythmic shhck-shhck as the blade glides over it, and feel the blade gradually getting sharper. It’s almost like you’re communing with the knife.
- Some describe it as having a quiet conversation with the blade – you develop a sense for how it responds to the stone, and you tune into the subtle feedback (sound, feel) as the edge improves. This can be surprisingly soothing and a great way to de-stress. It turns maintenance into a ritual you might actually look forward to.
Specific Sharpening Steps
Finally, let’s outline a straightforward sequence for sharpening your Yanagiba. These are the basic steps you’d follow each time, with key tips for each:
Finishing Up & Storage: Tips to Maintain Peak Sharpness
Once your knife is sharpened, a few final steps will help keep that edge superb for as long as possible:
Step 1: Post-sharpening check
- After sharpening, do a quick test. One simple test is to slice through a piece of paper or try a thin cut on a soft vegetable/fish to ensure the blade glides smoothly. Additionally, inspect the edge in good light – it should reflect almost no light if it’s truly sharp (a dull edge glints light).
- If you notice any roughness (perhaps you feel a slight catch when cutting), you might give it a few more light passes on the finishing stone. Sometimes just a bit of extra honing is needed for that final perfect edge. Make sure the edge meets your satisfaction before you move to storage.
Step 2: Apply oil (e.g. camellia oil)
- Most Yanagiba knives are made of carbon steel or have a high carbon content. To prevent rust, it’s highly recommended to apply a thin layer of oil on the blade after drying it. Traditional tsubaki (camellia) oil is commonly used in Japan for knife maintenance, but food-safe mineral oil or even a dab of cooking oil can work if you spread it thinly.
- Put a drop of oil on each side of the blade and wipe it with a clean cloth or paper towel so that the oil coats the steel evenly. Do not leave a heavy, dripping layer – that can get sticky or rancid. You just want a subtle sheen. The motto is “light coat for protection.” This will significantly help prevent any rust spots during storage.
Step 3: Store in a well-ventilated place
- How you store your sashimi knife matters. Ideally, keep it in a way that moisture isn’t trapped against the blade. Options include a knife sheath (wooden saya cover) which often comes with traditional knives, a knife guard, or a knife stand/block where the blade is exposed to air. If you use a sheath or case, make sure the knife is absolutely dry and maybe oiled, as mentioned, before sliding it in.
- Avoid leaving the knife in damp places like a wet countertop, the sink, or a humid drawer. For instance, the back of a cabinet or under-sink cupboard can get humid and cause rust over time. A dry, ventilated area is best. Some people even put a silica gel pack near their stored knives for extra peace of mind in humid climates.
With these steps, your Yanagiba will not only stay sharp longer, but it will also be ready and in great condition whenever you want to use it next. Good maintenance is the key to a long life for a quality knife.
Key Points for Choosing a Yanagiba/Sashimi Knife
By now, if you’re considering getting a sashimi knife, you might be wondering how to choose the right one for you. Ultimately, it boils down to a few factors: how often you’ll use it for sashimi, and how much effort you’re willing to put into maintenance and maximizing sharpness. These will determine what kind of knife suits you best.
Reflect on your cooking habits and priorities. Then consider these main points when selecting your Yanagiba or other sashimi knife:
- Material: Blade material affects performance and upkeep. A common path is to start with stainless steel, which is easier to maintain, then move to a carbon steel blade later if you want even higher performance (and don’t mind the extra care).
- Blade Length & Weight: For home use, a blade around 24–27 cm (9.5–10.5 inches) is generally ideal for balance. A lighter knife will be easier to handle and less tiring, while a heavier knife gives more stability – each has pros and cons, so if possible, try holding a few to see what feels best in your hand.
- Price Range: If it’s your first sashimi knife, there are great options in the roughly ¥10,000–¥20,000 (USD $100–$200) range that offer high quality without breaking the bank. If you’re an enthusiast looking for a top-tier knife, there are also higher-end traditional blades that can cost several hundred dollars (even $1000+), often handmade by renowned blacksmiths – these can be lifetime investments.
Let’s break these points down in more detail:
Material Selection
Choosing between stainless steel and carbon steel (hagane) for your sashimi knife is one of the first decisions. Each has its trade-offs:
Stainless Steel Knives
Rust-resistant and easy maintenance
- Stainless steel is popular for being low-maintenance. It’s much less prone to rust, so you don’t have to be as anxious about immediately drying the knife after every use (though it’s still a good habit). Cleaning up is simpler – no special oiling needed most of the time.
- This makes stainless a very beginner-friendly material. If it’s your first Japanese sashimi knife, stainless steel lets you practice and use the knife without worrying too much about upkeep.
Slightly less sharp than carbon steel (in some cases)
- Thanks to modern metallurgy, there are high-end stainless steels that are extremely sharp and durable. However, traditionally, carbon steels have a slight edge (pun intended) in ultimate sharpness and the ease of honing to a razor edge. Stainless knives can sometimes be a bit harder to sharpen or may not take quite as fine an edge as easily.
- That said, many stainless sashimi knives today perform exceptionally well – certainly well enough for home use or even professional use. The difference in sharpness compared to carbon steel has narrowed with advanced stainless alloys. So, a good stainless Yanagiba can absolutely do the job for most users.
Clad construction (composite blades)
- One popular option is a hybrid: a stainless-clad carbon steel knife. This means the core of the blade (the edge steel) is high-carbon steel for sharpness, but it’s laminated between outer layers of stainless steel.
- This gives you the best of both: the sharp, hard edge of carbon steel, and the rust-resistance and easier maintenance of stainless on the blade’s exterior. These “warikomi” or clad knives are highly regarded for balancing performance and practicality, and they’re very common in Japanese knives today.
(For more about the quirks of sharpening and maintaining stainless knives, see the reference article on stainless knife drawbacks.)
Carbon Steel Knives
Extremely sharp but prone to rust
- Blades made from traditional Japanese carbon steels like Shirogami (White Steel) or Aogami (Blue Steel) are famous for how incredibly sharp they can get and how long they hold that edge. A well-sharpened carbon steel Yanagiba feels like it glides through fish.
- The trade-off: they will rust or discolor if not cared for. If you leave a carbon steel knife wet or dirty even for a short time, you might come back to find orange spots of rust. So these knives demand that you wipe them dry promptly after each use and oil them before storage. The maintenance is higher, but many enthusiasts consider it worth the superior cutting feel.
Great for the dedicated enthusiast
- Our advice: if it’s your very first sashimi knife and you’re not used to caring for carbon steel, you might start with stainless to build your confidence. But if you find yourself falling in love with cooking sashimi or the craft of knives, a carbon steel Yanagiba could be your next step.
- Carbon steel knives are perfect for those who enjoy the process of knife care – sharpening regularly, keeping the blade immaculate – and who take pride in “raising” their knife. There’s a certain satisfaction in using a carbon steel knife that you’ve personally kept sharp and rust-free. It’s like owning a high-performance sports car that you lovingly maintain.
(For more on Japanese “hagane” (carbon steel) like Nihon-ko and how it differs from other steels, see the reference articles listed.)
Blade Length and Weight
When picking out a Yanagiba or sashimi knife, two big practical factors are the length of the blade and the knife’s weight (heft). These affect how the knife handles and what it’s best suited for.
2-1. Blade Length: ~21 cm to ~30 cm
Yanagiba and other sashimi knives come in various lengths, usually measured in centimeters in Japan (or inches in the West). Here’s a quick guide:
- Tip: For most home users, a 24–27 cm Yanagiba is highly recommended. It’s long enough to perform proper pull cuts on decent-sized pieces of fish, but not so long that it becomes unwieldy. If the blade is too short, you may find you have to do a sawing motion or multiple pulls to cut through a slice of sashimi, which can lead to uneven cuts. If it’s too long, it might feel tip-heavy and be difficult to control, especially in a small kitchen or if you’re not accustomed to it. The 24–27 cm range hits the sweet spot for balance.
2-2. Weight: Is Lighter Easier to Handle?
Sashimi knives can also vary in weight. Some have thinner spines and lighter handles, making them very lightweight, while others might be a bit beefier.
- Less fatigue: A lighter Yanagiba puts less strain on your wrist and arm during use. If you’re slicing a lot of fish or practicing for a long time, a light knife will be easier on the muscles. Long cutting sessions will be more comfortable.
- Delicate control: When working with soft ingredients like fish, a lighter knife can sometimes give you a finer sense of control. It responds quickly to small adjustments in your hand, which can help with precision when doing very delicate cuts or decorations.
- Cutting momentum: A knife with a bit of heft can actually aid in cutting. The weight of the blade can help it fall through the cut, especially if you encounter a tougher bit (say a piece of skin or sinew). It sort of carries itself, requiring less force from you.
- Stability: Many chefs feel that a slightly heavier knife has a more stable feel. The weight can reduce shakiness in your stroke, allowing you to slice straight and even. There’s a subjective element here – some just prefer the confidence a heavier blade gives, as it feels solid in the hand.
- If your main use for the knife is purely slicing boneless fish for sashimi and sushi, a lighter knife is often preferable. It will be agile and not tire you out, which is great for precision work.
- If you like a bit of stability and don’t mind the weight, or if you occasionally might use the knife for slightly firmer tasks (like slicing cured fish or other soft meats), a heavier knife could feel better. Some people just like that sense of momentum and sturdiness.
- Ultimately, the ideal scenario is to hold and maybe test-swing a knife before buying. See how it feels in your hand. Everyone’s hand and comfort is different – one person’s “too light and flimsy” is another person’s “beautifully nimble,” and one person’s “nice and hefty” is another’s “too heavy and clumsy.” If you can, visit a shop and compare.
What About Price? First Knife vs. High-End Options
Budget is a practical consideration. Sashimi knives can range from reasonably affordable to extremely expensive. Here’s a general guideline:
For your first sashimi knife (around $100–$200):
- In Japan, many quality knives in the ¥10,000 to ¥20,000 range are available (this is roughly $90–$180 USD, though prices vary). In this range, you can expect a knife that has reliable quality steel and craftsmanship – something that will serve you well without any major flaws.
- You’ll find a lot of stainless steel options and composite (stainless-clad) options here, which are great for beginners. Brands will often have “entry-level” Yanagibas that still use good steel but might be machine-finished or simpler in handle construction to save cost. They can last many years and perform excellently, especially with proper sharpening.
- The nice thing is, these knives can be used long-term. If you sharpen and care for them, a ¥15,000 Yanagiba can pretty much last a lifetime in a home setting. So it’s a safe starting investment that gives you a feel for whether you want to go deeper into this hobby.
For the serious enthusiast (several hundred to $1000+):
- On the higher end, you have knives ranging from ¥30,000 up to ¥100,000+ (a few hundred to over a thousand US dollars). These are often made by renowned craftsmen or traditional knifemaking families. They might use top-grade versions of steels (like Aogami Super, etc.), have beautiful finishes (mirror-polished bevels, ornate handles), and be mostly handcrafted.
- These can truly be “one knife for a lifetime” kind of tools. The price goes up due to factors like the skill of the maker, limited production, hand-forging processes, and sometimes the prestige of the brand or blacksmith. It’s similar to buying a luxury watch vs. a basic one – both tell time (or in this case, both cut fish), but the expensive one has that extra craftsmanship and allure.
- Ask yourself: “Do I want to nurture this knife and use it like a pro?” If you have a strong passion for making sashimi perfectly, or you just love knives and want a piece of that artisanal craft, then investing a few thousand dollars (or whatever your budget allows) can be worth it. Just remember, these high-carbon steel thoroughbreds require care and attention. If you buy a $500 Yanagiba and let it sit wet or neglect sharpening, it will rust or dull just as easily (if not more so) than a $100 one – in fact, it might be even more delicate. So high-end knives are recommended only if you’re also willing to commit to their maintenance. They reward you with exceptional performance and pride of ownership, but they do demand proper care.
Quick Recap on Choosing the Material
To summarize the materials aspect (because it’s important):
(See the reference guide on rust removal for tips on caring for carbon steel knives if you go that route.)
Conclusion
At first glance, a sashimi knife (Yanagiba) might seem like a tool you can live without. You might think, “I can slice fish okay with my chef’s knife, so why bother?” And indeed, for many home cooks a sashimi knife isn’t necessary. You won’t be in dire straits without it.
But – once you actually use a Yanagiba, it’s often a revelation. The sensation of how effortlessly it cuts, and the beautiful presentation of sashimi cut with it, can absolutely spark joy. That little fish prep for dinner suddenly feels like a special craft, almost like you’ve brought a bit of the sushi bar experience into your home. A task that used to be routine can become something you genuinely look forward to – a moment of zen and pride in your kitchen.
If you have even the slightest inkling of “I want to enjoy cooking more,” or “I’d love to take my fish prep to the next level,” then why not give a sashimi knife (Yanagiba) a try? It doesn’t have to be the most expensive one – even an entry-level Yanagiba, when properly used, can upgrade your sashimi game significantly.
Chances are, once you start slicing with one, you’ll catch yourself grinning at how smoothly it cuts and how gorgeous your sashimi looks. Using a sashimi knife can genuinely rekindle that excitement and satisfaction in the kitchen. Every time you pick up the knife, you might feel a bit of that “wow”. And that feeling – the mix of excitement and satisfaction – is the start of a new, happier chapter in your home cooking life.
Happy slicing, and enjoy your sashimi adventures!


Comments