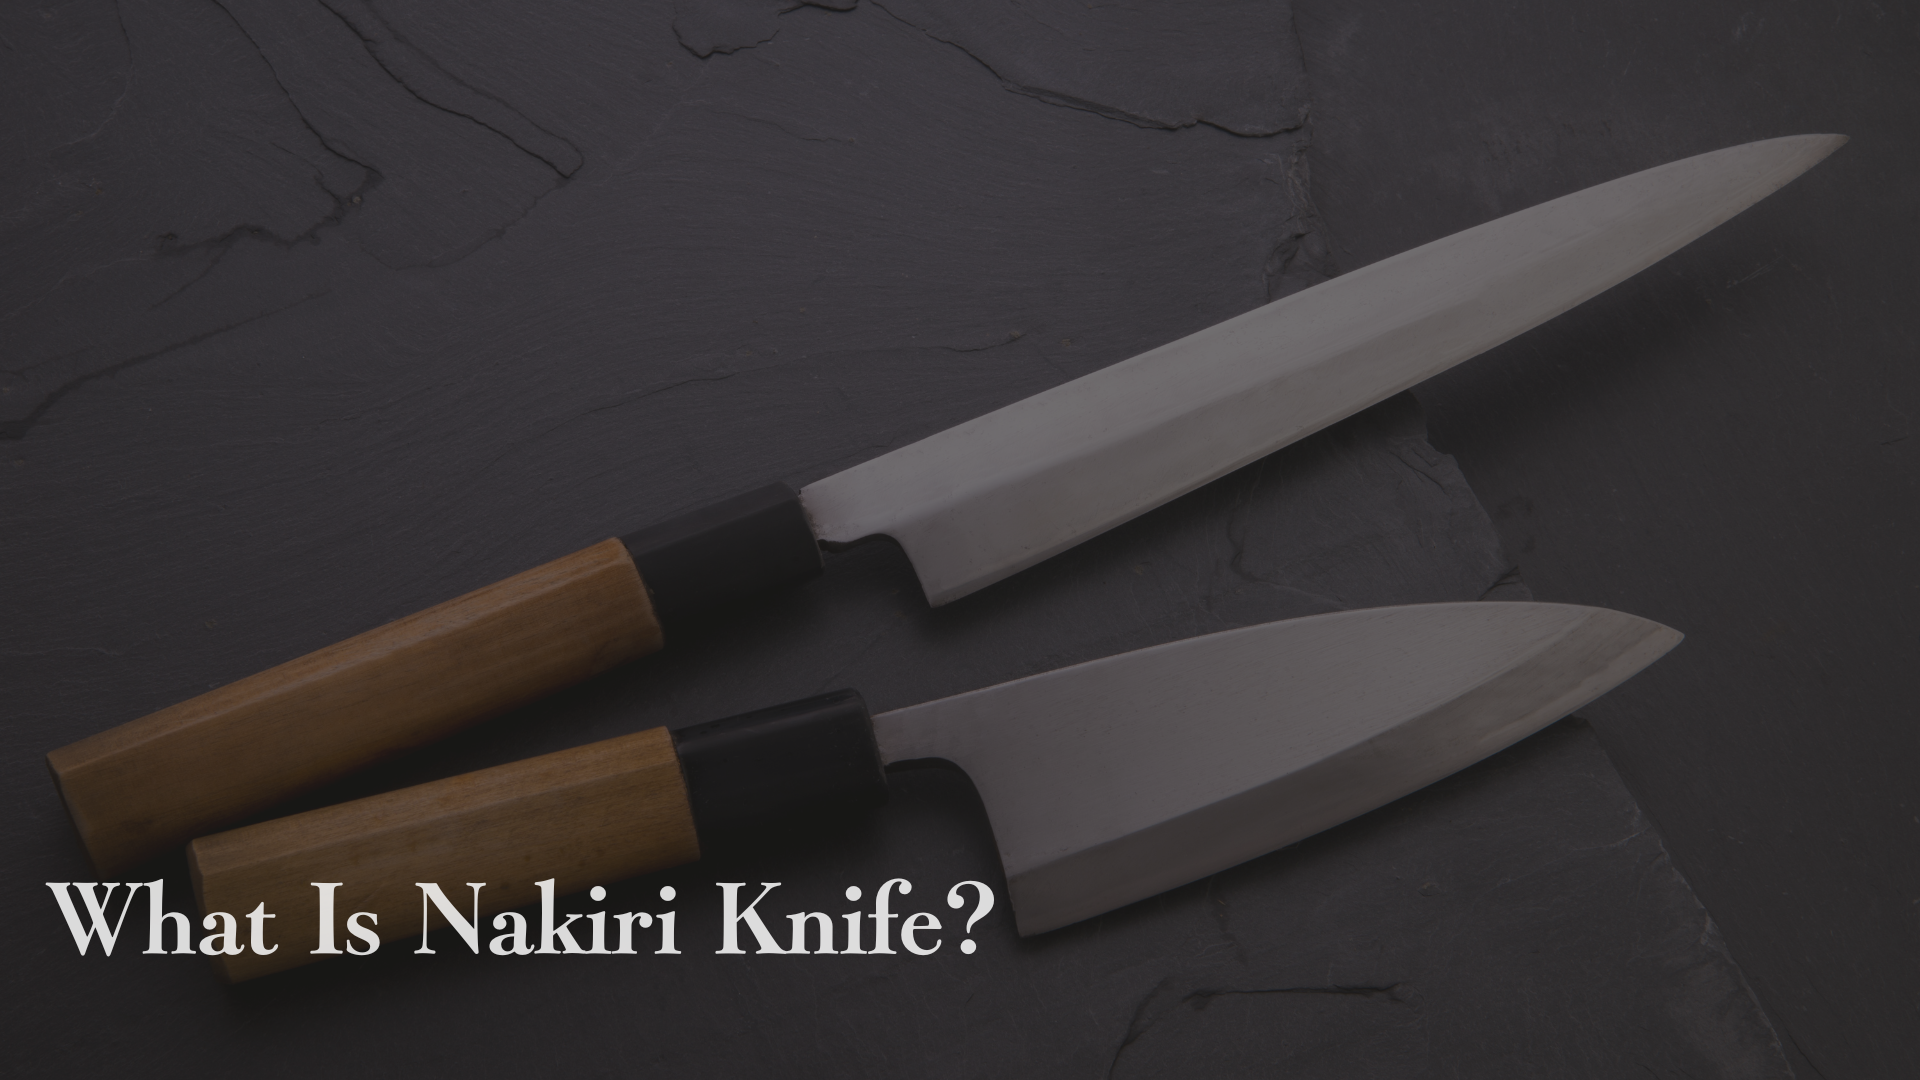
I remember the day I decided to start eating healthier and bought a mountain of vegetables on sale. I stood in my kitchen, staring at all the cabbage and carrots I needed to chop, and thought: “If only I had a Nakiri knife…”
Sure, I could manage with my regular chef’s knife (or Santoku), but tackling that pile of veggies felt like a workout.
Eventually, I got my hands on a Nakiri, and after the first use I wondered, “Why didn’t I get one of these sooner?!”
This article will introduce you to the Nakiri knife and help you decide if this special Japanese veggie knife is the missing piece in your kitchen.
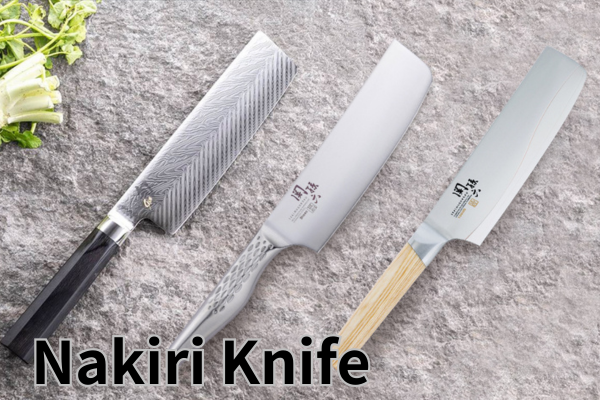
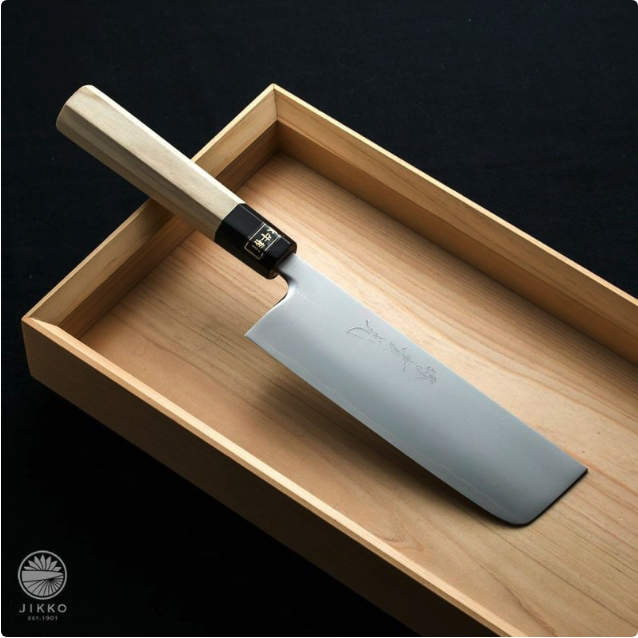
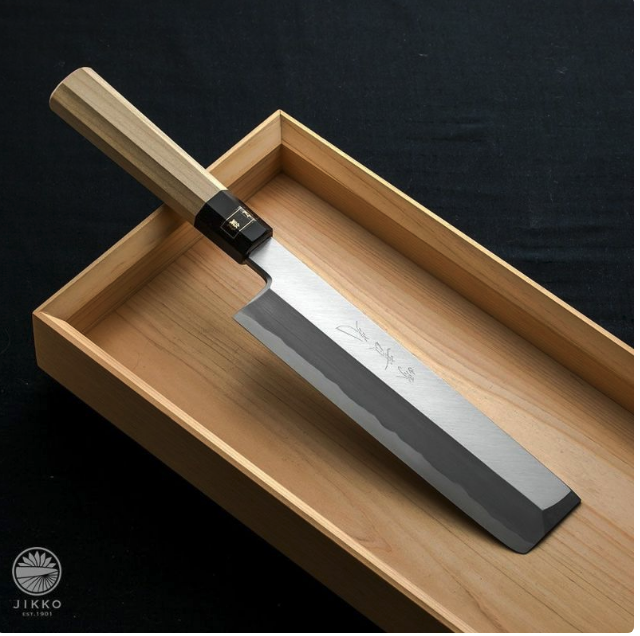
The Nakiri Knife – a rectangular Japanese vegetable knife with a straight, thin blade, perfect for high-speed vegetable chopping. Unlike Western chef’s knives, the Nakiri’s edge is almost completely flat, which allows it to slice through veggies without the rocking motion. In the home kitchen, this knife can make prepping vegetables feel effortless, especially when you have a lot to chop.
What Is a Nakiri Knife, and Why Do Some Say You Don’t Need One?
A Nakiri (pronounced “nah-kee-ree”) is a type of traditional Japanese knife specialized for cutting vegetables.
In Japanese, Nakiri bocho literally means “vegetable cutter.” It’s a knife designed to slice and chop vegetables quickly and beautifully.
Its defining features are a perfectly straight cutting edge (no curve) and a thin blade. This design lets you push straight down when cutting, which cleanly slices through vegetable fibers without wedging or cracking them.
On the flip side, a Nakiri knife’s use is strictly for produce – it doesn’t have the thickness or blade shape for cutting through bones, frozen foods, or heavy meats. In other words, it’s a true “vegetable specialist.” Because it won’t be your all-purpose knife for meat or fish, some people wonder if a Nakiri is really necessary. Let’s break down its characteristics and why people both love it and sometimes say they “don’t need it.”
Nakiri = A Knife Specialized for Vegetables
- Made for veggies: The Nakiri包丁 is a dedicated Japanese vegetable knife. It’s part of the wa-bocho (Japanese-style knives) family, and everything about it is optimized for slicing and dicing plant-based foods quickly and neatly.
- Straight, thin blade: A Nakiri knife typically has a flat, straight blade edge and a very thin blade profile. The blade is often shaped like a broad rectangle with a squared-off tip. This shape means you can chop all the way through vegetables without a rocking motion, and the thin blade slides through hard veggies (like carrots or daikon) with minimal resistance.
- Not for meat or fish: Because it’s so thin and the tip is squared, a Nakiri doesn’t have the robustness for cutting through animal proteins or bones. Tasks like trimming meat sinew or filleting fish are not what it’s made for. The Nakiri’s role is clearly defined as the “vegetable pro” in your kitchen knife lineup.
- Blade Length: Most Nakiri knives have a blade length around 16–18 cm (about 6–7 inches), which is considered the sweet spot for home use. This length is long enough to handle large veggies (think whole cabbage heads or hefty daikon radishes) while still being short enough to maneuver easily on a cutting board. (There are also smaller Nakiri knives under 15 cm for those with limited space or smaller hands, and these can be quite handy too.)
- Effortless bulk vegetable chopping: When you’re slicing and dicing a large volume of veggies, a Nakiri really shines. Compared to using a standard Santoku knife or even a Chinese cleaver, the Nakiri feels lighter and more nimble as it bites into veggies. Whether you use a straight push cut (downward chop) or a slight draw, the flat edge ensures the whole blade contacts the cutting board at once, making each cut clean. The wide blade also lets you scoop up the chopped pieces easily and transfer them to a bowl or pot. Many folks report that using a Nakiri makes cutting vegetables so satisfying that it turns a chore into a joy!
3 Reasons Some Think a Nakiri Is “Unnecessary”
So why would anyone say a Nakiri is “not needed”? Here are three common arguments:
In the majority of home kitchens, a Santoku knife (the popular Japanese all-purpose knife) is already capable of handling vegetables along with meat and fish. Santokus are relatively thin-bladed too, so they can manage root vegetables reasonably well. Because of this, many people feel they don’t need a dedicated vegetable knife — “It’s not like you can’t cut veggies with a normal knife,” they argue. In other words, if one good multi-purpose knife can do everything, why bother with a single-purpose Nakiri?
A Nakiri knife is a specialist. Its thin, flat blade isn’t suitable for heavier jobs like breaking down a chicken, carving, or slicing fish fillets. Skeptics point out that if you buy a Nakiri, you’ll still need other knives for those tasks. In fact, you might end up constantly switching knives during cooking (which some find cumbersome). To those who value minimalism or versatility, a “vegetables-only” knife can sound like a luxury or even a waste if it spends time in the drawer when meat or bread needs cutting.
Building on the point above, during a typical meal prep you often cut a mix of ingredients (meat, veggies, herbs, etc.). If you had a Nakiri, you’d use it for the veggies, then have to switch to another knife for meat or other tasks. Some people simply don’t want the extra hassle (and extra cleaning) of using a second knife just for veggies. They prefer to use one knife throughout to keep things simple.
Of course, it’s true that if you regularly prepare meat or fish, a Nakiri won’t replace your other knives. You’ll still reach for a chef’s knife, Santoku, or Gyuto for those jobs. So in that sense, a Nakiri is a bit of a luxury addition – a knife you add to your arsenal to make vegetable prep more efficient and enjoyable, rather than one that expands what you can cut. It’s all about what you value more: ultimate versatility, or having a tool that excels in one area.
Nakiri vs. Usuba: What’s the Difference?
You might have seen another traditional Japanese vegetable knife called an Usuba. Usuba knives look very similar to Nakiri knives — they’re also rectangular, thin, and meant for veggies. The main difference comes down to the edge: Nakiri knives are usually double-beveled (sharpened on both sides), whereas Usuba knives are single-beveled (sharpened on one side only).
To sum up the differences, here’s a quick comparison of Nakiri vs Usuba knives:
In essence, a Nakiri is like the user-friendly cousin of the Usuba. It gives you much of the same vegetable-cutting prowess but in a more approachable package. If you’re a home cook, a Nakiri is usually the way to go. An Usuba is amazing in the right hands, but unless you’re regularly doing delicate knifework for presentation (and are comfortable with sharpening single-bevel blades), a Nakiri will serve you better.
| Comparison Item | Nakiri Knife (Double‑Bevel) | Usuba Knife (Single‑Bevel) |
|---|---|---|
| Blade Shape & Construction | Typically double‑bevel Rectangular blade with square tip | Typically single‑bevel Very thin blade, squared‑off tip |
| Cut Surface / Finish | Symmetrical cut because of double edge Great for everyday prep | Perfectly straight, mirror‑clean cuts Ideal for delicate, precision work |
| Typical Uses | Quick, rough‑and‑ready chopping of all veggies Daily tasks from fine mince to thick slices | Katsuramuki peeling, decorative cuts, etc. Professional Japanese cuisine prep |
| Main Users | Wide range: home cooks to pros | Mostly pro chefs focused on washoku |
| Sharpening Difficulty | Easy to hone (double‑bevel) Beginner‑friendly | Requires technique due to single bevel Takes practice to master |
| Handling Cautions | Slightly thicker spine → fairly tough Can handle some foods beyond veggies | Extremely thin edge → chip‑prone Handle with extra care |
| Main Advantages | Easy to use, highly versatile Handles large vegetables with ease | Produces beautifully fine finishes Excels at intricate presentation work |
| Best‑Fit Scenarios | General home cooking & daily veg prep | Pro‑level washoku or hobbyists doing authentic decorative cuts |
Benefits and Drawbacks of a Nakiri Knife
So, what’s so great about a Nakiri knife? Let’s look at its pros and cons. Many people who start using a Nakiri are amazed by how it changes their vegetable prep. That said, no knife is perfect for everything, so it’s important to consider the downsides as well.
In a nutshell, the big advantage of a Nakiri is for those who cook a lot of vegetables: it can speed up prep time and improve the quality of your cuts simultaneously. On the flip side, the disadvantage is that if you try to use it for anything beyond veggies, you’ll be reaching for a different knife (like a Santoku or a Chinese cleaver) to cover those gaps.
Below we’ve broken down the key merits and demerits of using a Nakiri:
| Item | Merits | Demerits |
|---|---|---|
| Ease of Cutting Vegetables | Thin blade slices without crushing fibers Clean cut surface for a better texture | Unsuitable for prepping meat or fish Cannot handle bones or very hard frozen foods |
| Speed & Comfort | Quickly processes large volumes of veggies Wide blade lets you scoop chopped pieces easily | Low versatility—requires a second knife for meat/fish |
| Beauty of Finish | Shredded cabbage and daikon rounds stay intact Perfect for katsuramuki peeling & decorative cuts | Thin edge can bend or chip if abused Not suited to brute‑force tasks (pressing hard may chip the edge) |
| Price & Accessibility | Many high‑quality models around ¥10,000–¥20,000 (≈ $80–$150) Budget options (e.g. Nitori) also available | “Veg‑only” knife can feel like an extra investment Some cooks feel a Santoku or Chinese cleaver is sufficient |
As you can see, the Nakiri’s strengths are all about making vegetable prep faster, easier, and more fun, while its weaknesses revolve around it being limited to that one area. If your cooking involves a lot of veggies, a Nakiri can be a game-changer. But if you’re looking for one knife to do it all, a Nakiri alone won’t cover you.
Now, let’s put the Nakiri in context against two other common knives it often gets compared to: the Santoku and the Chinese cleaver.
Santoku vs Nakiri vs Chinese Cleaver: What’s the Difference?
For those thinking, “Do I really need a separate veggie knife, or will my Santoku/cleaver do?”, this section is for you.
| Item | Santoku Knife (All‑Purpose) | Nakiri Knife (Vegetable Specialist) |
|---|---|---|
| Shape | Slightly curved tip | Flat edge with squared‑off tip |
| Primary Use | Covers meat, fish, and vegetables “well enough” | Dedicated to vegetables (ideal for quickly slicing large amounts of roots & leafy greens) |
| Merits | Highly versatile and beginner‑friendly | Slices veggies without crushing fibers Delivers superb sharpness—great for fine shredding & katsuramuki |
| Demerits | Slightly inferior to a Nakiri for “ultimate” veggie cutting feel | Poor for meat or fish; low overall versatility (you’ll need a second knife) |
If you’re the kind of cook who loves chopping vegetables and wants that task to be as quick and enjoyable as possible, a Nakiri knife is going to be a reliable sidekick. The biggest deciding factor when choosing between a Nakiri and something like a Santoku or Chinese cleaver is this: Do you want a knife that’s 100% focused on veggies, or do you prefer one that’s more of a jack-of-all-trades? That’s the fork in the road.
To summarize upfront: A Santoku knife and a Chinese cleaver both offer more versatility, handling meat and fish in addition to veggies. The Nakiri knife is lighter and thinner, which means if you’re dealing with a huge pile of vegetables or you want very precise, paper-thin cuts, the Nakiri will make that task noticeably easier than the other two. But, of course, it won’t help you carve a roast or debone a chicken.
Let’s break it down one by one and then in a comparison table.
Nakiri vs Santoku
A Santoku is often called a Japanese all-purpose knife (“Santoku” roughly means “three virtues,” usually interpreted as slicing, dicing, and chopping). It’s the go-to knife in many Japanese home kitchens because it can handle vegetables, meat, and fish pretty well. So how does it differ from a Nakiri?
Why is a Nakiri better for veggies than a Santoku? It comes down to the blade design:
A Santoku’s blade has a gentle curve, which is a compromise to let you use it for different foods. In contrast, a Nakiri’s blade is almost completely flat. When you do an up-and-down chop with a Nakiri, the whole edge hits the cutting board at once. This push-cutting action means the vegetable is cut through evenly, without fibers still connecting at the bottom (a common issue if you use a rocking motion with a curved blade). Because you’re cutting veggies straight down, you’re less likely to bruise or crush them, which can make a difference in texture and appearance (think of slicing through a tomato skin perfectly without smooshing it).
Nakiri blades are usually thinner than Santoku blades, so they glide into firm vegetables with less effort. There’s less wedging action, so you don’t have to push as hard. Also, the greater blade width means after you chop something, you can scoop it up on the blade easily. This is a small time-saver when you’re transferring piles of diced veggies off the cutting board. In short, the Nakiri feels lighter and faster for high-volume veggie work.
So, which to choose – Santoku or Nakiri? It really depends on your cooking habits:
If you often find yourself chopping a mountain of vegetables (maybe you love salads, vegetarian cooking, or just batch-prep a lot of produce) or if you care about getting really clean, consistent cuts for presentation, then adding a Nakiri to your kitchen will make those tasks a lot more comfortable and fun. You’ll likely wonder how you managed without it, once you feel how effortlessly it can go through a big head of cabbage or dice onions for soup without the blade sticking.
If you’re someone who prefers to use one knife for everything and doesn’t mind making a few trade-offs, a Santoku might leave you perfectly satisfied. Many home cooks use a Santoku for all their daily cutting and don’t feel any pain points that would make them crave another knife. If that’s you, you might not feel an urgent need for a Nakiri (though it’s still nice to have if you’re curious).
Nakiri vs Chinese Cleaver
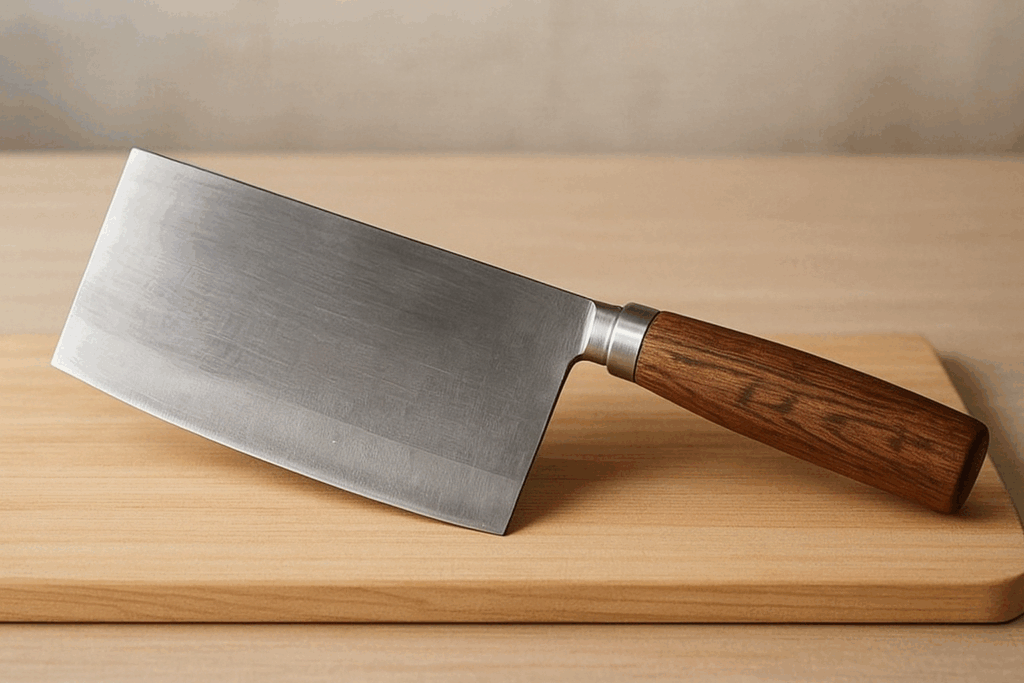
At a glance, a Chinese cleaver (often just called a “Chinese chef’s knife”) looks a lot like a Nakiri’s bigger cousin. It’s large, rectangular, and you’ll often see Chinese chefs using it to do everything from mincing garlic to chopping through bones. It’s tempting to think, “Hey, the Chinese cleaver is basically a big Nakiri, right?” But there are important differences in thickness, weight, and intended use.
First off, Chinese cleavers are generally much thicker and heavier. There are different classes of Chinese cleavers: some are thinner for slicing (often called a Cai Dao for vegetables) and some are thick for heavy-duty chopping. But even the slicers tend to have more heft than a Nakiri. This weight is what allows a Chinese cleaver to cut through things like small bones or very hard foods by using momentum.
Nakiri knives, as we’ve discussed, are thin and light, focusing on finesse rather than power.
Here’s a side-by-side comparison:
On the other hand, the Nakiri knife is purpose-built for those who primarily want to slice and chop vegetables with precision and ease. It’s the go-to for someone who might already have other knives for meats, etc., but wants the best tool for veggies. If you rarely cut up whole chickens or don’t need to hack through bones, you might prefer the lighter feel of a Nakiri for daily cooking.
| Item | Nakiri Knife (Vegetable Specialist) | Chinese Cleaver (All‑Purpose) |
|---|---|---|
| Thickness & Weight | Thin, lightweight blade Prioritizes agility for veggies | Thick, heavy blade Can chop through bone‑in meat |
| Blade Shape | Wide, flat edge with squared tip Very thin cross‑section | Extra‑wide but noticeably thicker spine Built for hefty chopping & pounding |
| Primary Use | Dedicated to vegetables Slices roots & leafy greens cleanly without crushing fibers | Handles meat, fish, veggies—everything The classic “do‑it‑all” Chinese chef’s knife; can break bones & smash aromatics |
| Ease of Handling | Lightweight & thin—beginners can make precise cuts with confidence | Weight lets you power through cuts Can cause fatigue in long sessions |
To put it succinctly:
- Chinese Cleaver: Great all-in-one knife if you need to tackle a wide range of ingredients (and don’t mind the weight). It’s common in scenarios where “meat and veggies, one knife for all” is needed. Think stir-fry prep: chop some pork ribs, then garlic, then vegetables, all with the same knife.
- Nakiri Knife: Great if your cooking is vegetable-centric or you want the ultimate ease for veg prep. It’s not going to help with carving a steak, but it will make slicing a pile of carrots feel like butter. And because it’s lighter, you might find it more comfortable for extended chopping sessions or for making very controlled cuts (like neat julienne or paper-thin slices).
To drive home the differences, here’s a quick triple comparison including the Santoku, Nakiri, and Chinese cleaver:
Comparison: Nakiri vs Santoku vs Chinese Cleaver
| Item | Usuba / Nakiri Knife (Vegetable Specialist) | Santoku Knife (All‑Purpose) | Chinese Cleaver (Heavy‑Duty) |
|---|---|---|---|
| Main Purpose | Optimized for vegetables (roots, leafy greens, decorative cuts, etc.) | Covers meat, fish, and veggies as a true “multi‑purpose” knife | Excels at powerful chopping of meat, fish, and veggies (bone‑in tasks included) |
| Blade Thickness & Weight | Thin and lightweight | Moderate thickness and weight | Usually thicker and feels heavy |
| Shape | Edge nearly straight; very thin profile | Slightly curved tip; narrower blade width | Wide, rectangular blade with substantial heft |
| Merits | Easily slices veggies without crushing fibers Ideal for katsuramuki & decorative cuts | One knife can handle almost everything Beginner‑friendly and easy to control | Bone‑in meat OK Great for Chinese chopping & pounding motions |
| Demerits | Nearly useless on fish or bone‑in meat—low versatility | Less specialized—tasks like sashimi or katsuramuki need extra skill | Heavy; requires practice to control Over‑spec if you only need neat veggie slicing |
| Best Suited For | Those who prep vegetables often and value fine, precise cuts | Beginner‑to‑intermediate cooks wanting one versatile knife | Fans of Chinese cuisine who need a powerhouse for bone‑in cuts |
Tips for Choosing Between Them
- If you find that vegetables comprise a big part of your cooking (maybe you’re vegetarian, or you just cook a ton of produce every day) and you’re seeking that extra comfort and speed in cutting, then investing in a Nakiri knife will likely make you very happy. The difference in how it cuts veggies compared to a Santoku can be significant – it just feels so much smoother and more efficient for that specific purpose. Many who switch to a Nakiri for their veggie tasks say their prep time decreases and they actually enjoy chopping more.
- If you want to keep things simple with one do-it-all knife, the Santoku is a safer bet. It’s the workhorse that can handle 90% of tasks in a pinch. You might not experience the peak performance for veggie slicing that a Nakiri offers, but you also won’t have to swap knives mid-cooking. And if you lean more towards cooking proteins or a mix of ingredients, a Santoku or Chinese cleaver covers those bases better.
Finally, for those who like Chinese cleavers: it’s a fantastic tool if you embrace its style, but be mindful that it requires a slightly different technique (often more of a chopping motion and using the weight of the knife). Also, some home cooks find the size intimidating or unwieldy for small tasks. A Nakiri will definitely feel more familiar to anyone used to a Western chef’s knife or Santoku, just lighter and more specialized.
In short, each knife has its place. Some kitchen knife enthusiasts (myself included) keep all three around and use each for what it’s best at. But if you’re trying to choose just one or two: go with what fits the majority of your cooking.
Now, assuming you’re intrigued by the Nakiri’s veggie-cutting prowess, let’s look at how to choose a good Nakiri and how to use it effectively!
Tips for Choosing a Nakiri Knife
Ready to buy a Nakiri? Here are a few key points to consider when selecting the right one for you:
- Blade Length: Stick to 16–18 cm (6–7 inches) blade length for general home cooking. This range is the most popular and for good reason: it’s long enough to handle big root vegetables, but still short enough to maneuver easily for fine work. If you go much longer (20+ cm), the knife can feel a bit unwieldy and you’ll need to make sure your cutting board and storage space can accommodate it. If you go much shorter (under 15 cm), you gain agility but might struggle with larger produce. For most people, 16–18 cm is the “just right” zone.
- Material – Stainless vs Carbon Steel: Nakiri knives come in various steels, mainly either stainless steel or high-carbon steel (or laminated combinations).
- Stainless steel Nakiri: These are low-maintenance and resistant to rust, which makes them great for beginners or busy cooks. You don’t have to worry as much about wiping the knife dry immediately or oiling it. Modern high-end stainless steels can also hold an edge quite well, so you’re not necessarily sacrificing performance. If you want easy upkeep, go stainless.
- Carbon steel Nakiri: Carbon steel knives (often traditional ones are made from steels like white #2 or blue steel in Japan) can take a razor-sharp edge and many pros love their cutting feel. The trade-off is they can rust or discolor if not cared for (you have to keep them dry and occasionally remove any patina/rust). They also might need sharpening a bit more frequently (though sharpening is part of the fun for some!). Choose carbon steel if you’re willing to do a bit more maintenance and you value that ultra-sharp edge. It’s great for enthusiasts who enjoy knife care as a hobby.
- Price Range: You don’t have to break the bank for a first Nakiri. Even around $80–$120 you can find excellent quality Japanese Nakiri knives that will last and perform beautifully. If you’re on a tight budget or just want to experiment, there are even Nakiri knives in the ~$20 range from brands like Nitori (a popular Japanese home goods store) or other entry-level makers. These budget options often use simpler stainless steel, but many are quite decent for the price and can be a great way to try out a Nakiri without much investment. On the flip side, if you’re serious and have the budget, artisanal handmade Nakiri knives can run $200, $300, or more – these often have top-tier steel, beautiful craftsmanship (like Damascus patterns or traditional finishes), and superb durability. They’re not necessary to enjoy the benefits of a Nakiri, but they are certainly a joy if you appreciate fine knives.
- For first-timers, spending around $100 (give or take) can get you a high-quality Nakiri that will serve you extremely well.
- If you’re just curious and not sure you’ll like it, something like the Nitori all-stainless Nakiri (often ~$20) is a fun, low-risk purchase. Despite the low price, it’s actually quite capable and gives you a taste of what using a Nakiri feels like.
- If you know you love it and want a heirloom-quality knife, explore the higher-end — you’ll find Nakiris with gorgeous handles, super steel cores, etc. It all depends on how deep you want to go down the rabbit hole!
(For more on knife materials and what those steel names mean, you might want to check out guides on knife steel types. But we’ll focus on usage next.)
One strategy some people use: Buy an inexpensive Nakiri first to see how it fits your cooking, then upgrade later if you find yourself using it a lot. For instance, grabbing that Nitori Nakiri or another budget brand is a great way to test the waters. If it turns out you love having a Japanese vegetable knife in your kitchen, you can consider investing in a fancier model down the line. And if not, well, you still have a handy spare knife that didn’t cost much.
(I personally started with a cheap Nakiri, and once I realized how often I was reaching for it, I treated myself to a nicer one from Sakai city, which I now adore.)
Now that you’ve picked out a Nakiri (or are seriously considering it), let’s talk about how to make the most of it. The next section will cover usage tips and techniques to ensure you get that wonderful, effortless veggie-cutting experience the Nakiri is known for.
How to Use a Nakiri Knife: Tips for Easy Vegetable Cutting
If you’re new to the Nakiri, don’t worry — with a little practice, it will become your trusty vegetable sidekick. In fact, using a Nakiri is quite straightforward since its design naturally guides you to a simple up-and-down chopping motion. Here are some tips and tricks to help you get the best results and truly enjoy cutting vegetables with this knife. Once you get the hang of it, you might find that the comfortable cutting feel of a Nakiri actually boosts your motivation to cook more veggies (it’s that satisfying!).
Give these techniques a try and enjoy the delicate, precise cuts that only a thin, flat blade like the Nakiri can deliver:
Basic usage tip: When cutting, hold the Nakiri so that the blade is vertical (90°) to the cutting board and push straight down through the vegetable. This straight “press cut” will let the knife’s sharp edge do the work, slicing fibers cleanly. Thanks to the Nakiri’s flat profile, you don’t need to rock the knife—just lift and drop. After you’ve made your cuts, you can even use the broad side of the blade to scoop up the cut pieces and transfer them, which is a nice little time-saver.
Basic Nakiri Technique
- Use the right blade length effectively: If your Nakiri is around 16–18 cm (as most are), you’ve got a nice balance of length and control. Make full strokes to cut through larger veggies. For something like a big daikon radish or a potato, you can usually cut through in one stroke thanks to that length. At the same time, that length isn’t so unwieldy that you can’t do small precise cuts—so feel free to mince garlic or shallots with it too. It’s more versatile in practice than people think (again, for veggie tasks).
- Hand positioning – the “claw” grip: Always mind your off-hand (the hand not holding the knife). When holding a vegetable to chop, curl your fingers under into a “cat’s paw” or claw shape, so that your knuckles, not your fingertips, are facing the blade. This is standard knife technique, but it’s worth emphasizing because the Nakiri’s straight edge will be making full contact with the board – meaning if your fingers are in the way even a little, you could nick them. The flat blade of the Nakiri actually gives you great stability against the knuckles as a guide, and because it’s tall, it can sort of shield your fingers as long as they’re curled properly. So, make the claw and let the side of the blade glide against your knuckles as you chop. This will feel very stable and safe once you get used to it.
- Leverage the flat blade for stability: One nice thing about the Nakiri is that, since the blade is broad (tall), a lot of its surface can rest against the cutting board during a cut. This gives a sense of stability. Unlike a narrow knife that might wobble, the Nakiri’s width helps keep it aligned straight as you chop. You’ll especially notice this when cutting harder items: it doesn’t twist easily. That said, always keep a good grip and use controlled motions.
Use a Vertical “Push Cut”
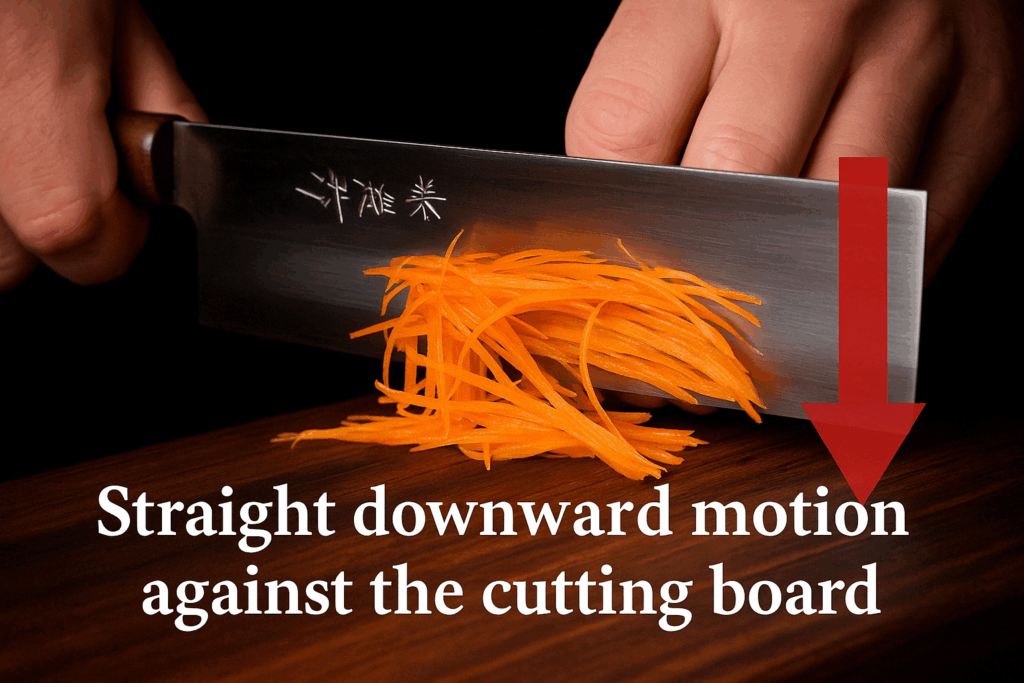
In Japanese, the typical motion used with a Nakiri is often called “押し切り” (oshi-giri), which means push cut (pressing down). Here’s how to do it:
- Position the knife vertically: Line up the blade so it’s almost straight up and down relative to the cutting board (perpendicular). On a Western knife, you might tilt forward or backward for a slicing motion, but with a Nakiri you want to be pretty much straight.
- Push straight down: Bring the knife down through the vegetable in a straight line. It’s okay if you use a slight forward motion as you go down (some people naturally do a tiny push forward), but the key is you’re not sawing or rocking. It’s more of a chop, but a very controlled, smooth chop.
- Minimal horizontal movement: Try not to pull the knife towards you or push it far forward while cutting. The idea is to let gravity and the sharp edge do the work. By avoiding a lot of horizontal drag, you prevent shredding or crushing the vegetable. For example, when cutting a carrot, if you go straight down, you get a nice clean coin; if you were to aggressively pull the knife toward you, you might skid and create an uneven cut or tear the carrot before it’s fully sliced.
- Rhythm and lift: Lift the knife just enough that the entire blade clears the cut and then repeat. You can get a rhythm going: lift, drop, lift, drop. Start slowly to ensure accuracy, then speed up as you feel comfortable. Experienced Nakiri users can go quite fast and it looks almost like the knife is simply flying up and down in place as the veggies fall away in pieces.
The benefit of the push cut with a Nakiri is evident when you look at the sliced surface of, say, a tomato or a cucumber: it’s very smooth and clean. The vegetable maintains its structure (since you didn’t have to see-saw through it).
This also means things like lettuce or herbs cut with a sharp Nakiri might brown a little less quickly on the edges, because you’ve sliced cleanly instead of crushed. In terms of cooking, a clean cut can even affect texture (imagine bite-size pieces of cabbage in a stir-fry that all have neat edges – they’ll cook uniformly and look great).
Why the Wide Blade Feels Stable
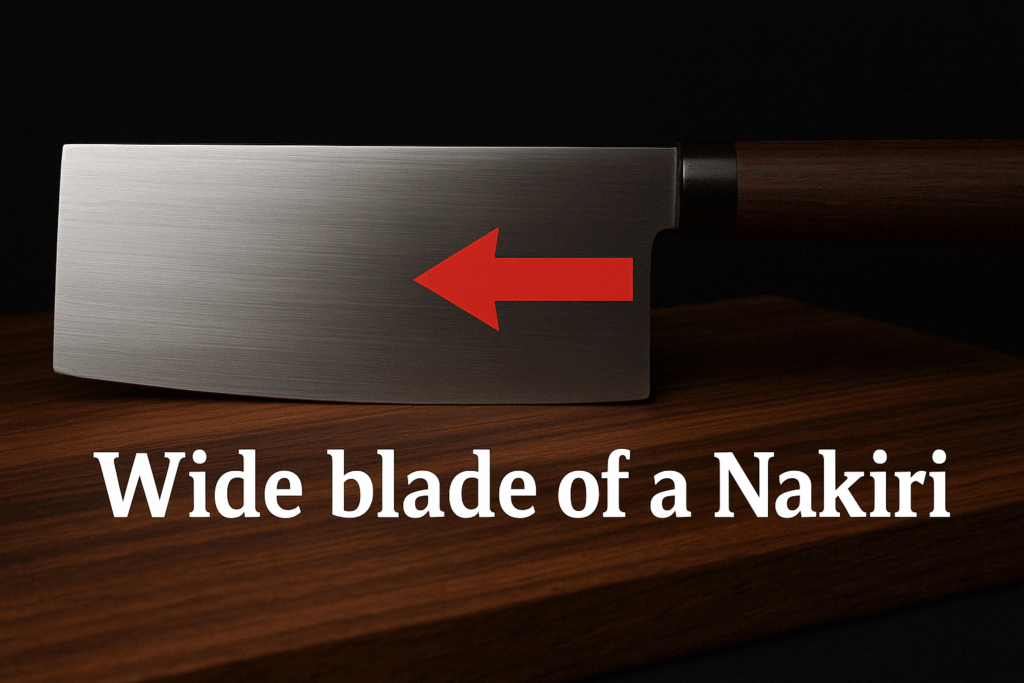
We touched on this, but let’s elaborate: the wide blade of a Nakiri is a big asset.
- Less wobble: Because a Nakiri’s blade (from edge to spine) is tall, when part of that blade is on the cutting board, it has a large flat area to rest on. For example, if you’re slicing a big eggplant, as soon as you start cutting in, the blade’s flat side is hugging the cut you’ve made and part of it is usually still against the board. This wide contact keeps the knife from turning or tipping. With a narrower knife like a paring knife, cutting something large can feel like the knife might tilt or the cut can go slanted; with a Nakiri, it tends to want to cut straight down naturally.
- Confidence with hard veggies: When you’re chopping firm veggies (a hefty potato, a big turnip, etc.), the Nakiri’s broad blade gives you confidence. You can almost feel the knife staying straight as you apply force. Always use your guiding hand and good technique, of course, but the tool itself lends stability. Many people comment that the Nakiri feels “secure” or “anchored” in a nice way during cuts.
- Using the blade as a guide: For certain techniques like katsuramuki (cutting a paper-thin continuous sheet from a radish or cucumber) or making very consistent thin rounds, the blade’s flat side can actually act like a guide or platform. In katsuramuki, for instance, you hold the vegetable and rotate it against the blade – the wide blade helps support the vegetable as you peel. It’s hard to do that with a narrow blade. Even when chopping, you might find that the blade’s flat side pressing against the food (or your knuckles) helps keep things steady.
Effortless Cabbage Shredding & Scooping
One of my favorite “feels” of using a Nakiri is when shredding cabbage for coleslaw or slicing up a bunch of scallions or herbs. The Nakiri just sails through:
- Shredding cabbage or leafy greens: To make fine chiffonade or shred of a large leafy vegetable (like cabbage, lettuce, or kale), a trick is to use the flat length of the blade almost like a draw slicer. For example, cut a cabbage in half (so you have a flat side to lay on the board). Then start slicing from the top of the cabbage half, moving the Nakiri in a slight forward motion as you push down. Because the blade is flat, you can get uniformly thin shreds. Another tip: some cooks angle the Nakiri slightly and draw it back toward them while pushing down – this effectively slices with the back portion of the blade in a straight line. Experiment to see what motion gives you the thinnest slices. The Nakiri’s straight edge will ensure each slice is even thickness since there’s no rocking curve.
- Use the flat blade as a scoop: After you’ve chopped a bunch of veggies, you’ll often have them spread out on the board. With a Nakiri, you can turn the knife sideways and use it like a spatula to scoop things up. Since it’s broad and usually has a squared tip, it holds a lot. For example, after dicing an onion, I just slide the Nakiri under the pile of onion pieces, and in one or two scoops I can move all of it to my pot. This beats trying to pinch them with your hands or chasing little pieces around. It might seem minor, but it really keeps your workflow tidy and fast. Plus, using the knife to scoop means fewer tools to dirty (no need for a bench scraper).
Keeping your workspace neat: Because you can scoop and move ingredients easily, a Nakiri can actually help keep your cutting area cleaner. If you’re the kind of cook who gets bits of food all over the place, using the Nakiri to corral and transfer them can make a difference.
Push vs. Pull Cutting Motion
With a Santoku or Western chef’s knife, you might be used to a pull cut (drawing the knife towards you as you slice down) or a push cut (pushing forward as you go down) or a rocking motion. With a Nakiri, as described, it’s more of a pure up-and-down motion. But that doesn’t mean you can’t incorporate a bit of forward/backward movement.
- Primarily up-and-down: When you start, focus on purely vertical chops. This will give you the cleanest cuts and help you get a feel for the knife’s balance. It’s the most stable approach for a Nakiri.
- Incorporating draw (pull) or push: Once you have the straight chop down, you can experiment with slight modifications. For example, some users like to do a tiny “pull cut” – they set the blade down on the veggie and as they chop, they draw it back a centimeter or two. This can help initiate a cut, especially on something like a tomato (where you break the skin by drawing, then push through). Others do a slight push cut, moving the blade forward as they go down, which effectively lengthens the slice and can feel smoother on some foods. Both are valid; it’s more about personal comfort. The key is, any push or pull should be slight – you’re not sawing back and forth. It’s more like adding a glide to the cut.
Think of it as adding a bit of slice to the chop, turning a pure chop into a slice-chop hybrid. A well-sharpened Nakiri will happily cut with or without this extra movement.
- Avoiding bad habits: One thing to avoid is twisting the knife or using the tip to poke in (since the tip is squared, it’s not meant to be used like a piercing tool). Also avoid scraping the edge on the board to move food (use the spine or the side for scraping to protect the edge).
With practice, you’ll find what combination of motions works best for you. But generally, people find the Nakiri encourages a mostly straight technique and becomes almost an extension of your hand for rapid chopping. It’s quite intuitive once you get going.
Wide Blade for Precision Cuts
We talked about stability, but the wide blade also helps in guiding precision cuts and handling certain ingredients during fancy knifework:
- Supporting the food: Let’s say you want to do a decorative cut, like cutting a thin slice in a radish to make a garnish, or the classic katsuramuki (which is essentially taking a big radish (daikon) and peeling it around and around into one long paper-thin sheet). The Nakiri’s blade provides a large, flat surface that you can use to steady the vegetable as you cut. For katsuramuki, chefs often hold the knife stationary and turn the radish against the blade – the wide blade helps keep the radish aligned and peeling evenly. It’s tricky to describe in text, but imagine trying that with a narrow knife – it would be much harder to keep the peel consistent because you have less surface to guide the cut.
- Confidence in angles: If you’re doing something like cutting decorative grooves or patterns (for example, the Japanese matsukawabori (pine needle cut) on a carrot, or making a flower shape), having a straight, predictable blade like the Nakiri helps you measure your angles. You know exactly where the blade’s edge is going to land because it’s a straight line. With a curved knife, sometimes beginners overshoot or undershoot because the tip and heel are at different levels. The Nakiri’s simplicity (straight edge) is actually an advantage for learning precise cuts.
Example – Carrot flower cut: One common decorative cut is to make a carrot slice look like a flower. You typically cut V-shaped notches along the length of a carrot, then slice the carrot into coins so each coin has a flower petal shape. Using a Nakiri, you can stick just the corner of the blade in to make those V cuts with precision, because the tip is squared and you can line it up perfectly. Each notch can be cut by inserting the Nakiri a little and levering out a tiny wedge. The thinness of the blade helps it glide in, and the straight edge means each notch is consistent. People often find this easier with a Nakiri than a heavier chef’s knife.
Scooping Up Ingredients
We covered this a bit, but let’s emphasize the proper (and safe) way to use your Nakiri to transfer food, because it’s one of those little things that once you master, you’ll love:
- How to scoop: After chopping, turn the knife sideways so the sharp edge is facing away from your hand (you don’t want to accidentally cut yourself). Using your free hand or the knife itself, pile the cut veggies together a bit. Then slide the flat side of the Nakiri under the pile. Because the blade is broad and usually rectangular, it holds a good amount. With your hand on the spine (the blunt top edge) of the knife for stability, carry the knife to your pot or bowl and tilt it so the ingredients slide off. You’ve just moved stuff without having to pick up the cutting board or grab a separate scraper.
- Be mindful of the edge: Always use the back or side of the blade for this scooping motion against your cutting board—don’t drag the sharp edge sideways on the board as that can dull it quickly. With a Nakiri’s flat profile, it’s easy: just lay it flat and use the side. Some Nakiris even have a slightly blunt front corner (because of the squared tip), which you can also use to scrape together bits on the board safely.
- Safety benefit: The wide blade can also act as a bit of a safety guard while you’re chopping. If you have your claw grip with the off-hand, the broad side of the Nakiri is between your fingers and the moving edge. This isn’t foolproof protection (you still need to position your fingers correctly), but it does provide more coverage than a narrow blade. Beginners often feel more secure chopping thin slices with a Nakiri for this reason—less of the blade is exposed near their fingers. Still, remember that wide blade doesn’t mean you can lose focus; always maintain that curled fingers grip.
One more small benefit: if you ever need to smash garlic or ginger, the Nakiri’s flat blade can do it (just lay the blade on the clove and whack it with your palm, like you would with a chef’s knife). It’s quite robust in that lateral sense.
Great for Decorative and Precision Cuts
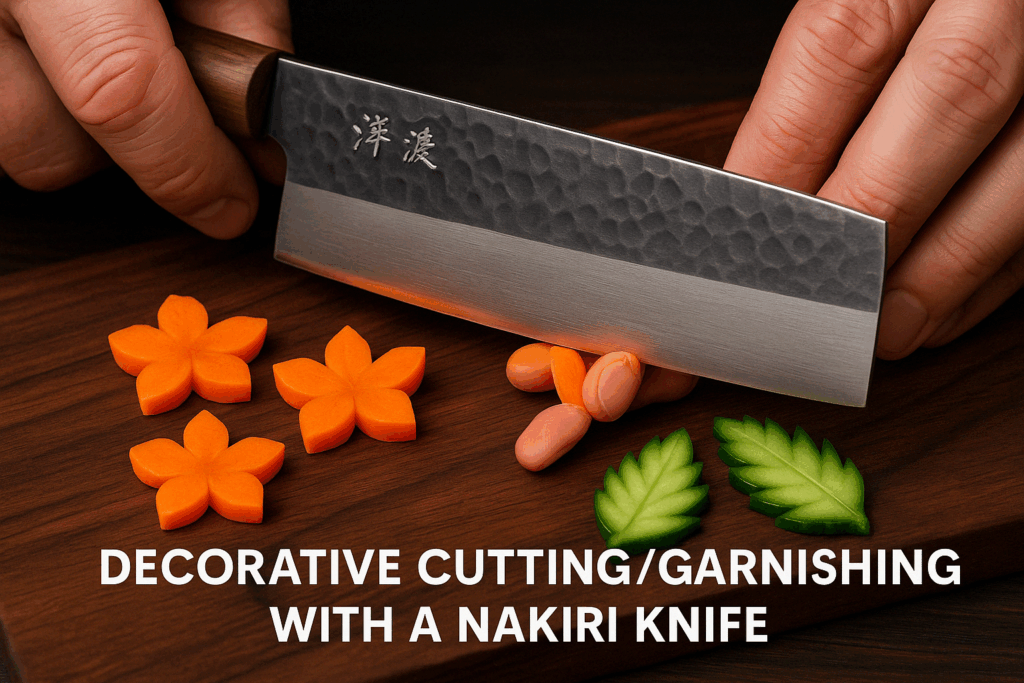
Another big advantage of the Nakiri knife is how well it handles delicate knife techniques and garnishing tasks. Its shape and sharpness make it a joy for any kind of detailed vegetable work:
Precise tip control: Because the Nakiri’s blade is straight and thin, you can easily control exactly where it goes. Let’s say you want to do a detailed cut like creating a lattice pattern on a piece of carrot or cutting out a garnish. You can insert the tip of the Nakiri just a little bit into the vegetable at a precise spot, and then either push or lever it to make the cut. The lack of curvature means the blade enters uniformly, so you can judge the depth and angle precisely. It almost feels like using a small saw with a perfectly straight blade. This allows for very intricate carving or scoring that might be harder with a curved blade which can slip or whose angle changes along its length.
For example, in “kazarigiri” (decorative cutting), there are techniques like cutting a carrot into a plum blossom shape or making pretty cutouts. A Nakiri can make the initial incisions cleanly and with confidence. When I carve carrots into flowers, I often make five shallow incisions down the sides of the carrot (to form the petals). Using the Nakiri’s squared tip to start those cuts, I can ensure each incision is at the same depth and angle. Then I slice the carrot into coins, and voila – each slice looks like a little flower. The consistent straight blade helped ensure all those notches were even.
Beginner-friendly for practice: If you’re new to decorative cuts, you might think a smaller knife or paring knife is better. But many beginners actually find a Nakiri easier for these tasks because of the blade geometry. The thinness means it slides without wedging, and the fact that it’s not double-beveled like a Western knife (which often has a thicker spine) means less of the blade is pushing on the cut area, so you’re less likely to crack something by accident. Also, since the Nakiri’s blade is uniform, you don’t get weird curvature messing up your practice cuts. You can start with shallow cuts, as mentioned, and gradually deepen them as you become more comfortable, knowing the blade will behave predictably.
One tip: when practicing any new cut, go slow. The Nakiri rewards a slow, steady hand when you’re doing detail work. It’s not a race; even professionals take their time for the really ornate cuts. The good news is, because the Nakiri cuts so cleanly, even a slow cut will come out nice (it won’t tear the veggie if you move deliberately). And as a bonus, when you go slow, you’re less likely to make mistakes. With time, you’ll speed up naturally.
Beautiful results: One thing you’ll notice is that vegetables cut with a Nakiri often look really nice. The slices have smooth surfaces that catch light, the shapes are intact (no half-torn pieces), and thin slices are uniform. This can elevate the presentation of your dishes. If you make a stir-fry with veggies cut by a Nakiri, you might see that everything cooks evenly and the dish just looks a bit more restaurant-like because each piece is cleanly cut. If you do a salad, the lettuce won’t have bruised edges, the cucumber slices will be shiny and precise, etc. These little details can subconsciously make a meal more appetizing.
For those who love plating food beautifully or doing bento decorations, a Nakiri is almost a must. It allows you to execute those creative ideas – whether it’s turning a cucumber into thin ribbons or cutting radishes into roses – with relative ease. And when your food looks good, it boosts your confidence and enjoyment as a cook. I find that using the Nakiri often gives me a little spark of joy seeing a pile of perfectly sliced veggies, which in turn motivates me to cook more and eat more veggies (win-win!).
In summary, mastering the Nakiri can deepen your appreciation for the art of cooking. There’s something deeply satisfying about working with a tool that does exactly what you want it to. Those perfect slices and delicate cuts are not just visually pleasing; they can make cooking feel like less of a chore and more of a craft. So take your time, practice a bit, and soon you’ll see why so many home cooks become Nakiri enthusiasts.
How to Sharpen a Nakiri Knife
Now, owning a Nakiri (or any good knife) also means taking care of it. The good news is, keeping your Nakiri sharp is not difficult, and you don’t have to sharpen it as often as, say, a knife that cuts through meat and bone (since those dull a knife faster). However, to maintain that effortless cutting experience, you will want to sharpen your Nakiri periodically.
There’s a saying that since a Nakiri is “just for vegetables” and doesn’t contact hard stuff like bones or plates, it stays sharp longer and you can get away with sharpening it less frequently. There’s some truth to that – your Nakiri likely won’t dull as quickly as a butcher’s knife might. It also doesn’t get as grimy (no animal fat or acid from meats to corrode it). But vegetables can still dull a knife over time, especially if you’re cutting things like carrots (which can have a bit of grit) or squash. And if you want that silky smooth cut every time, a regular touch-up is worth it.
In short: Just like any knife, a Nakiri benefits from routine sharpening. It’s not magically maintenance-free because it’s a veggie knife. The nice part is, sharpening a Nakiri is very similar to sharpening any double-edged kitchen knife, so if you have experience with a whetstone on your chef’s knife or Santoku, you can do the same with the Nakiri.
One thing to be aware of: the Nakiri’s blade is thin, so you want to use a gentle touch when sharpening. You don’t need to grind hard; in fact, pressing too hard on a thin blade while sharpening can cause it to flex or even create unevenness.
Here are some sharpening tips:
- Use a whetstone if possible: While pull-through sharpeners or honing rods can work in a pinch, the best way to sharpen a Nakiri (especially a quality one) is on a whetstone. It gives you control and a razor edge. Start with a medium grit (around #1000) for maintenance sharpening.
- Angle: Maintain about a 15–20 degree angle on each side if it’s double-bevel. That’s pretty standard for kitchen knives. If you’re not sure what that looks like, it’s roughly the angle you get if you raise the spine of the knife about 1/3 of an inch (0.5~0.75 cm) off the stone for a Nakiri about 5cm tall. Consistency matters more than the exact number, so find an angle that matches the existing edge and stick with it.
- For double-bevel Nakiri (most common): Sharpen both sides evenly. Do, say, 10 strokes on one side, then 10 on the other, and repeat. Because the Nakiri edge is straight, you can actually sharpen the entire length uniformly (there’s no curved tip to worry about). Make sure you cover heel to tip in your strokes.
- For single-bevel Nakiri/Usuba: If you happen to have a single-bevel Usuba or Nakiri, the technique is a bit different. You’ll sharpen the beveled side at the edge angle (usually very low, around 10-15 degrees) and keep that flat side almost completely flat on the stone just to remove the burr. This requires more skill, but most likely you’ll have a double-bevel unless you specifically bought a traditional Usuba.
- Light pressure: Remember the motto “easy does it”. Apply only light to moderate pressure on the blade against the stone. Let the stone and the abrasive do the work. If you press too hard, especially on a thin knife, a couple things can happen: you might accidentally gouge more metal than you want (removing too much steel and shortening the life of the knife), or you might even slightly deform the edge. A Nakiri doesn’t need heavy grinding since it generally doesn’t get super rolled or damaged if used only on veggies. Often, just a nice gentle sharpening will bring it back to ultra-sharp.
- Avoid “gorilla grip” sharpening: (This is a fun term some use to describe when someone is grinding a knife on a stone with lots of muscle and pressure). That approach might be used for a very damaged blade or a super thick knife, but on a Nakiri, that kind of force can actually ruin the fine edge. You could strip off the keen edge and end up with a duller knife than you started with if you overdo it. So take it nice and slow.
Whetstone Grit Progression: For a Nakiri, a simple two-step sharpening is usually perfect:
- #1000 grit (medium grit) – This is your workhorse stone. Use this to reset the edge. A few passes on a #1000 can often bring back the sharpness if it’s moderately dull. If your knife has any tiny chips or rolls, #1000 is usually coarse enough to fix those with a bit of work.
- #3000–#5000 grit (fine grit) – After the #1000, move to a finer stone to polish the edge. This will refine the edge and give you that smooth push-cut feeling again. On veggies, a polished edge tends to slide easier. By the time you finish on, say, a #3000 or #5000, the edge should be almost mirror-like and extremely sharp to the touch. You don’t necessarily need to go higher than 5000 for a Nakiri, as beyond that you start getting into razor blade territory (which is nice but a highly polished edge can sometimes slide too easily off smooth veggie skins – some actually prefer a tiny bit of bite left which a 3000-5000 grit finish gives).
After sharpening, always test the edge carefully. You can slice a piece of paper or gently shave a bit off a tomato to see how it bites. A well-sharpened Nakiri will effortlessly cut through a sheet of paper or the skin of a tomato with no crushing. It’s a beautiful thing!
Maintenance frequency: You might find you only need to sharpen your Nakiri every few weeks or months, depending on use. Since it mostly encounters produce, which is relatively gentle, the edge degradation is slow. However, keep an eye (or feel) on it. If you sense that chopping green onions isn’t as slick as before or you feel more resistance in a potato, it’s time for a touch-up. Sometimes even a quick honing on a ceramic rod (for stainless Nakiris) or a few light passes on a fine stone is enough to refresh it between full sharpenings.
Also, remember to keep the knife clean and dry. After each use, rinse off any acidic vegetable juices and wipe it dry (especially if it’s carbon steel). This prevents any subtle corrosion that might dull it. A well-cared-for Nakiri can last generations.
Sharpening can actually be a fun ritual – many find it relaxing. And nothing beats the first cut with a freshly sharpened Nakiri: you’ll literally feel it glide like new again. So don’t neglect sharpening; your knife (and your veggies) will thank you!
Recommended Nakiri Knives (What to Look For)
If you’re excited about getting a Nakiri, let’s quickly go over some options or features you might consider. There’s a wide range of Nakiri knives out there, from budget-friendly to high-end artisan. Here are a few categories to think about:
Smaller Nakiri (around 15 cm / 6”) – These are sometimes marketed as “mini Nakiri” or just shorter Nakiris. They can be great if:
- You have small hands or prefer a lighter knife.
- Your kitchen or cutting board is small, so a long knife feels cramped.
- You intend to do a lot of precise work (a smaller blade can be a bit easier to maneuver for fine tasks).
Despite being shorter, they are still true Nakiris in design. Many people (including some women or older folks with smaller grips) find a 5-6 inch Nakiri more comfortable for extended use. They often weigh a bit less too, reducing hand fatigue. For example, a home cook with limited counter space might love the agility of a 15cm Nakiri for everyday cooking. Keep in mind though, if you often deal with big produce (large melons, giant cabbage heads), a small Nakiri might require more strokes to get through.
Standard Size Nakiri (around 18 cm / 7”) – This is the classic size you’ll see in most stores. An 18cm Nakiri is like the Goldilocks “just right” for the average person:
- It has enough blade length to cut large veggies in one go (great for things like eggplant planks, full-length carrot sticks, etc.).
- It maintains that inherent stability and leverage we talked about.
- Most traditional makers produce Nakiris in this range, so you’ll have the most selection here.
For most people, I’d recommend starting with a standard size unless you have a specific reason to go smaller. It’s the intended size that Nakiris were historically used at in many cases. You really can’t go wrong with ~17-18cm from a reputable brand.
Budget-Friendly Options (e.g. Nitori’s All-Stainless Nakiri) – If you’re budget-conscious or just experimenting:
- Brands like Nitori (in Japan) offer an all-stainless steel Nakiri at a very low price (roughly 2,000 yen, which is under $20). This knife is actually quite popular as a starter Nakiri. It’s lightweight, stainless (so easy care), and surprisingly sharp out of the box. The steel quality isn’t top-tier, but it’s decent. It may not hold its edge as long as expensive knives, but it sharpens easily. For occasional use or as a test drive, it’s excellent.
- Other entry-level brands (sometimes generic ones) might have Nakiris in the $30-$50 range. These often use something like 420J stainless or similar – not amazing steel, but functional. They’re usually machine-made and might have plastic handles. But you know what? They cut veggies just fine for the most part. If you’ve never used a Nakiri, even these low-cost ones will give you a feel for the style.
- When to upgrade: If you find yourself loving the Nakiri and using it daily, you might start to notice the budget blade getting dull faster or maybe not cutting as smoothly after a while. That’s when investing in a higher-grade Nakiri (with better steel like VG-10, AUS-8, Swedish stainless, or carbon steel like White #2, etc.) makes sense. Those will hold a sharp edge longer and often come with nicer handles (which feel better) and overall better balance.
Mid-Range to High-End Nakiri: Once you go above ~$100, you’ll find knives from famous Japanese knife makers – often with forged blades, sometimes layered Damascus patterns, beautifully finished handles (wood like oak, walnut, magnolia with horn ferrules, etc.). Some renowned brands for Nakiri include Shun (they have a Nakiri in their classic line), Wusthof even makes one (though that’s German made, not Japanese), and then many traditional Japanese smiths from regions like Sakai, Seki, and Tosa have their versions. At the high end, some Nakiris are basically works of art – hand-folded steel, intricate patterns, super-hard core steel that stays sharp a long time. They can cost a few hundred dollars. Those are certainly not necessary for functionality, but they’re a joy to use if you appreciate craftsmanship and can afford them. They often have a bit more weight and solidity (since they’re forged, not stamped), which some people enjoy because it adds a touch of heft (though still lighter than a cleaver).
To sum up buying advice: If you’re starting out, you can absolutely get by with a budget Nakiri to see how you like it. Something around $20-$50 will work. If you already know you want a good one, aim for the ~$100 range for a nice balance of quality and value. And if you’re a knife aficionado or simply want the best and prettiest, there are plenty of options above $150 that are as much collectibles as they are kitchen tools.
One more thing – since Nakiri knives are quite popular now even in the West, you might find them from non-Japanese brands too. Just make sure the one you get has that proper shape (some cleavers are mislabeled as Nakiri, but they’re thicker). You want that thin blade and straight edge.
Oh, and don’t forget the handle comfort. Traditional Nakiris often have a “wa-handle” (round or octagonal wood handle with a collar). These are lightweight and nice to hold. Some modern designs might have Western-style handles (riveted like a chef’s knife). Handle is personal preference – just ensure it feels secure and comfortable in your hand. A Nakiri is meant to be held in a pinch grip (blade pinched between thumb and index finger, with handle in your palm), like most chef knives, so the handle mainly needs to be stable and the right size for you.
Before concluding, I’ll say this: There’s nothing wrong with starting cheap and working your way up. Even a low-cost Nakiri will outperform a dull all-purpose knife on veggies. And if you end up loving it, you can then justify a nicer purchase later. I started with the Nitori Nakiri just to see if I’d use it, and once I was hooked, I invested in a handcrafted one. The difference is noticeable (finer steel, nicer feel), but the cutting concept is the same. I still lend out my cheap Nakiri to friends to try out because it’s such a fun knife.
Conclusion
Is a Nakiri knife “necessary”? Maybe not for everyone. But for a lot of home cooks (especially vegetable lovers), once they try a Nakiri, they’ll tell you they never want to be without one again.
On one hand, yes, you can live without it: if you don’t cut many vegetables or your Santoku/chef’s knife already handles your veggies just fine, then you’re not missing a critical tool. In that case, you’re justified in thinking, “I don’t really need a Nakiri.” Your cooking routine might be perfectly comfortable as is.
On the other hand, if you have a veggie-centric cooking style or you often find yourself prepping a lot of produce and wishing it was quicker or easier, then a Nakiri is more than just a luxury – it can become a game-changing companion. It brings a level of comfort and efficiency to vegetable prep that is hard to give up once you’ve experienced it. As we’ve covered, it’s all about the right tool for the job: and for chopping vegetables, the Nakiri is the tool.
To recap:
- If you barely chop veggies or are perfectly happy with your current knife, you’re probably fine skipping the Nakiri (for now). No need to fix what isn’t broken.
- If you love cooking vegetables, want to save time in prep, or want to improve the consistency and look of your vegetable cuts, a Nakiri knife will likely become your new best friend in the kitchen.
So ask yourself about your cooking habits. Do you dread slicing onions or shredding cabbage with your current knife? Do you avoid certain recipes because the thought of chopping that many veggies is tiring? If so, that’s exactly when a Nakiri can swoop in and say, “Hey, I’ll make that easier for you!”
For me, personally, adding a Nakiri to my arsenal has made my “vegetable days” (meal prep days with lots of produce) actually enjoyable. I look forward to chopping now; it’s almost therapeutic. And the results – heaps of uniformly sliced veggies – are kinda beautiful to behold and definitely noticeable in cooking.
One more thing: you don’t have to spend a lot to try it out. Even a reasonably priced Nakiri will give you that “aha” moment. So if you’re curious – maybe you want to blitz through salad prep or slice carrots paper-thin just for fun – then go ahead and pick up a Nakiri, even an entry-level one. Give it a test run in your kitchen. You just might find yourself saying, “Wow, why didn’t I get this sooner?!”
Lastly, I hope this article has given you a good understanding of the Nakiri knife – its purpose, its benefits, how to use it, and how it compares to your other options. Choosing the right knife is a personal decision, but having the right information helps. If you do get a Nakiri, take your time to practice with it and enjoy the process. With a bit of experience, it could very well become the knife you reach for most when you’re cooking a hearty veggie stir-fry, a comforting stew, or a fresh salad.
Happy vegetable chopping, and enjoy your cooking! 🥕🔪

Comments